Copy button for code blocks with AstroJS and TailwindCSS
Add a copy button to code blocks in AstroJS
This is another in the AstroJS series but this could be ported to anything JavaScript based. It does assume you are using tailwindcss. In this post we are going to add a copy button to any/all code blocks on the page.
Explanation
I want to add this to my blog posts to make it easier to copy the plain text of code blocks using a button. This has become a standard feature on tech blog posts, for good reason.
Requirements
We need this feature to:
- add a button inside of all code blocks in a blog post i.e.
<pre> - add button programatically after the page is rendered
- requests access to clipboard
- reset button state when user clicks another button (copy vs. copied)
- retain the formatting of the code block i.e. line breaks
Code
I chose to add this as a reusable component. The full code is available at the bottom of the post. Let’s take it one function at a time.
Copy to Clipboard
Access to the clipboard requires approval from the user. The API returns a promise with the result. If the user grants access, we try to write to the clipboard. If the write is successful, we move on. If there is an error we create an alert to inform the user.
const copyToClipboard = (value) => {
    navigator.permissions.query({ name: "clipboard-write" }).then((result) => {
      if (result.state === "granted" || result.state === "prompt") {
        navigator.clipboard.writeText(value).then(
          () => {},
          () => {
            alert("Failed to write to clipboard!");
          }
        );
      }
    });
};
Reset Button Text
This function is responsible for resetting the button text. We need to do this to reflect the proper state of the buttons. Since a user can only click one at a time we can take a fairly naive approach. We also know that we are only going to have a few of these code blocks on the page at any time so performance is not a huge concern here. Understanding all of this we can come up with a simple scheme for updating the text of the button to reflect the current state. When any copy button is clicked, we will change all the buttons text to “Copy”, then we update the current button to “Copied”. This is about as simple as we can get. There isn’t a single local variable needed for tracking state!
const resetButtonText = () => {
    codeSections.forEach((section) => {
      let button = section.querySelector("button");
      button.innerText = "Copy";
    });
};
Extract Text
This functions job is to extract the plaintext from the code block.
Each line is inside a span element so we need to loop through all the children, except for the copy button. We concatenate each line together with the += operator into a local variable and we get a plaintext copy of our code snippet.
const extractText = (element) => {
    let allText = "";
    for (const child of element.children) {
      if (child.nodeName !== "BUTTON") {
        allText += child.innerText;
      }
    }

    return allText;
};
Main Body
This code is in the script tag, which will be added to the body, so it will run after the content we need has loaded.
First, we will find all the pre elements. Then we loop through those, create a button, add the text “Copy”, add styles, and a click event that handles copying and updating the button text. Then we add the button as a child of the code section. The order does not matter here because we are positioning the button absolutely. This works because the pre elements are already styled with position:relative in my AstroJS theme.
NOTE: Make sure that your pre elements have position:relative set or the absolute positioning of the button will not work properly.
let codeSections = document.querySelectorAll("pre");
  codeSections.forEach((entry) => {
    let copyButton = document.createElement("button");
    copyButton.innerText = "Copy";
    // this is tailwindcss specific. Change as needed.
    copyButton.classList.add(
      "absolute",
      "top-1",
      "right-2",
      "white",
      "text-sm",
      "p-1",
      "hover:bg-white/30",
      "hover:rounded"
    );
    copyButton.onclick = (e) => {
      resetButtonText();
      copyButton.innerText = "Copied!";
      copyToClipboard(extractText(entry));
    };
    entry.appendChild(copyButton);
Usage
If you don’t already, you should have a separate template for your blog posts vs. the rest of your site. You can have more if you want but we need at least 2 for this scenario. Below is my blog post layout. This allows us to encapsulate all of the blog post layout in one place and make it different from the rest of the website.
This component should be used in the body, after the content you wish for it to manipulate. Here we are using it in our BlogPost.astro layout file like <CodeCopyButton />.
<html lang="en">
  <body>
    <Header />
    <main>
      <article>
        <div class="hero-image">
          {preview && <img width={1020} height={510} src={preview} alt="" />}
        </div>
        <div class="prose">
          <div class="title">
            <div class="date">
              <FormattedDate date={pubDate} />
              {
                updatedDate && (
                  <div class="last-updated-on">
                    Last updated on <FormattedDate date={updatedDate} />
                  </div>
                )
              }
            </div>
            <h1>{title}</h1>
            <hr />
          </div>
          <slot />
          <BlogComment />
          <CodeCopyButton />
        </div>
      </article>
    </main>
    <Footer />
  </body>
</html>
Component
This component uses the is:inline directive which will result in an embedded script wherever you use it. This is why we need to put it in the body after the content we want to manipulate. If we added this to the head it would not work because the HTML would not have been rendered yet. There are things we could do to make it work in the head but there is no need and it makes the code more complicated and harder to read. Let’s work with the technology not against it, right?
<script is:inline>
  const copyToClipboard = (value) => {
    navigator.permissions.query({ name: "clipboard-write" }).then((result) => {
      if (result.state === "granted" || result.state === "prompt") {
        navigator.clipboard.writeText(value).then(
          () => {},
          () => {
            alert("Failed to write to clipboard!");
          }
        );
      }
    });
  };

  const resetButtonText = () => {
    codeSections.forEach((section) => {
      let button = section.querySelector("button");
      button.innerText = "Copy";
    });
  };

  const extractText = (element) => {
    let allText = "";
    for (const child of element.children) {
      if (child.nodeName !== "BUTTON") {
        allText += child.innerText;
      }
    }

    return allText;
  };

  let codeSections = document.querySelectorAll("pre");
  codeSections.forEach((entry) => {
    let copyButton = document.createElement("button");
    copyButton.innerText = "Copy";
    // this is tailwindcss specific. Change as needed.
    copyButton.classList.add(
      "absolute",
      "top-1",
      "right-2",
      "white",
      "text-sm",
      "p-1",
      "hover:bg-white/30",
      "hover:rounded"
    );
    copyButton.onclick = (e) => {
      resetButtonText();
      copyButton.innerText = "Copied!";
      copyToClipboard(extractText(entry));
    };
    entry.appendChild(copyButton);
  });
</script>
Notes
The styles may need to be adjusted depending on the theme and other styles you already have configured. This worked great for me with the default theme and tailwindcss.
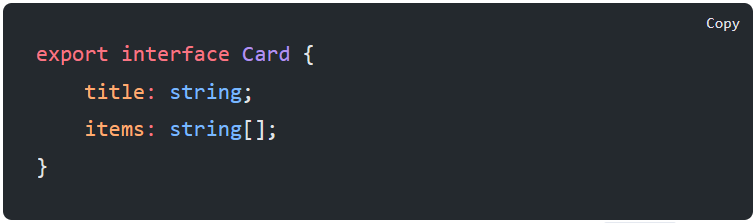
You may need to adjust the extractText() function if the structure of your <pre> and <code> sections are different. For reference, this is what mine looks like on the rendered page.
<pre class="astro-code github-dark" style="background-color:#24292e;color:#e1e4e8; overflow-x: auto;" tabindex="0" data-language="ts">
    <code>
        <span class="line">
            <span style="color:#F97583">export</span>
            <span style="color:#F97583"> interface</span>
            <span style="color:#B392F0"> Card</span>
            <span style="color:#E1E4E8"> {</span>
        </span>
        <span class="line">
            <span style="color:#FFAB70">    title</span>
            <span style="color:#F97583">:</span>
            <span style="color:#79B8FF"> string</span>
            <span style="color:#E1E4E8">;</span>
        </span>
        <span class="line">
            <span style="color:#FFAB70">    items</span>
            <span style="color:#F97583">:</span>
            <span style="color:#79B8FF"> string</span>
            <span style="color:#E1E4E8">[];</span>
        </span>
        <span class="line">
            <span style="color:#E1E4E8">}</span>
        </span>
        <span class="line"></span>
    </code>
    <button class="absolute top-1 right-2 white text-sm p-1 hover:bg-white/30 hover:rounded">Copy</button>
</pre>
If this helps you out or you notice something I missed, leave me a message.