Install the Orbiter Filament Sensor on a Longer LK5 Pro
Greetings, fellow sentients! In this post we will walk through how to install the orbiter filament sensor on a 3d printer that is already equipped with the orbiter extruder and klipper firmware. The Orbiter docs do a really good job of explaining everything, so I won’t bother repeating much of that here. I do, however, want to provide guidance on a few things that gave me trouble when I was going through the process.
In this case, I will be installing the orbiter filament sensor on a Longer LK5 Pro with version 1.5 of the orbiter design and a few other mods. The only mod worth mentioning here is klipper. Using klipper firmware enables the load and unload macros and is highly recommended in the orbiter documentation if you want full functionality.
Wiring Harness Length
NOTE: This is not necessary for all printers and depends on the kit you buy. The kit I bought was intended for an Ender 3 or similar and was a bit short. The LK5 is 400mm on the z-axis, so we need to extend the wiring harness. If you are decent at soldering this won’t be hard! I recommend adding the wire in the middle so you can retain the connectors on either end. You could also change it to a JST connector, or whatever works for your board.
Macros
These are straightforward; they may need some tweaking of the variables that control speed and distance in order to get the filament into and out of the extruder. The temperature may need adjusting, too, depending on what filament you are printing with. I like 220c for PLA/PETG/TPU, which is most of what I use, but you will need to adjust the temp for different filaments like ABS and such.
This is what works for me:
[gcode_macro _SENSOR_VARIABLES]         # change here macro configurables, enable disable functions!*************************
variable_filament_load_temp     :220    # temperature to heat up hotend for filament loading, default is 235
variable_filament_unload_temp   :200    # temperature to heat up hotend for filament un-loading, default is 185
variable_filament_load_min_temp :190    # minimum hotend set temperature allowed in filament load macro, default is 190
variable_nozzle_purge_length    :100    # filament extrude amount during load sequenc, hotend purge from old filament, default is 200
variable_nozzle_purge_speed     :450    # filament extrude speed in mm/min adjust this value lower if flow is too high and extruder skips during loading, default is 300
variable_unload_distance        :65     # filament retract distance for unload procedure. this length shall be long enough to extract the filament above the drive gears
variable_disable_autoload       :False  # disable filament autoload feature by setting this variable True
variable_disable_runnout        :False  # disable runnout by setting this variable True
variable_disable_autounload     :False  # disable auto unload filament by setting this variable to True
variable_enable_beep            :True   # uses M300 sound feature, set it True to enable
variable_park_position_x        :230    # edit your X parking position here for pause macro trigerred by runnout
variable_park_position_y        :10     # edit your Y parking position here for pause macro trigerred by runnout
variable_park_lift_z            :10     # edit your Z lift amount for parking position here, default is 10
Variable_park_retraction        :1      # edit your retraction amount for parking, default is 1
gcode:
Note: If you print with materials that have a big temp range, you may want to consider creating multiple printer config files. This way, you could have a “PLA profile” for filament that is around 220 (PLA, PETG, TPU). There are some good ideas in this reddit post.
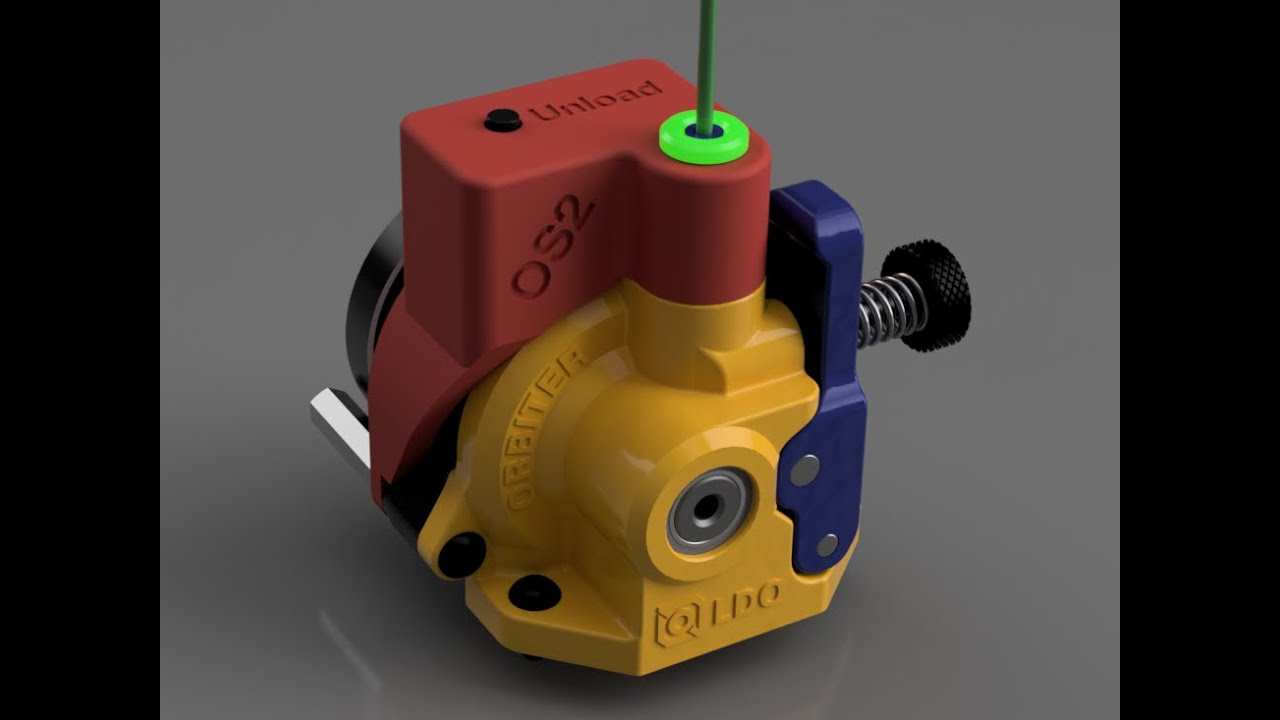
Different Case Designs
There are different designs for the different iterations of the orbiter extruder and filament sensor; make sure you are selecting the model that works with yours. I have v1.5 of the extruder design. The different iterations can look very similar but cannot be swapped, so be careful!
Identifying Pins
The filament sensor has 4 pins that need to be connected for full functionality:
- Blue = Ground
- Red = +3.3v
- Green = sensor
- Yellow = unload button
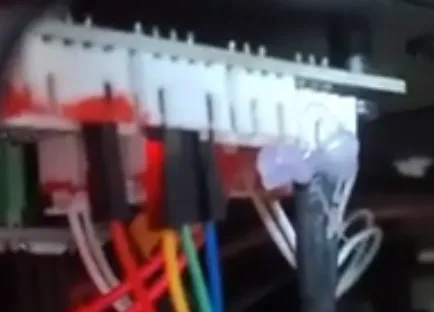
The power and ground are easy enough to find, but the I/O pins can be tricky. As you can see in the above image (sorry about the quality!), I am using the power pin from the AUX-1 port. This was originally used for the screen but I removed that when I upgraded to klipper. I use an old android device with klipperscreen configured, but that’s for another post. For the next group, I use 3 of the 4 pins, identified as D4, D5, D6, and GND on the board. We need 2 of the digital pins (I chose D5 and D6) and the GND (Ground).
This is where things can start to diverge, because there are different boards with different configurations. This can make it difficult to identify which pins you need to use in the klipper config. On the Longer LK5 Pro, for example, the pins are called things like D4, D5, D6; in klipper we would reference them as PG5, PH3, PE3. This may be confusing at first but this abstraction layer allows us to use a common set of pins in the config files. Each manufacturer may connect them differently under the hood, so we need to be able to “translate” back and forth when using the values printed on the boards - like my Longer LK5 pro.
-
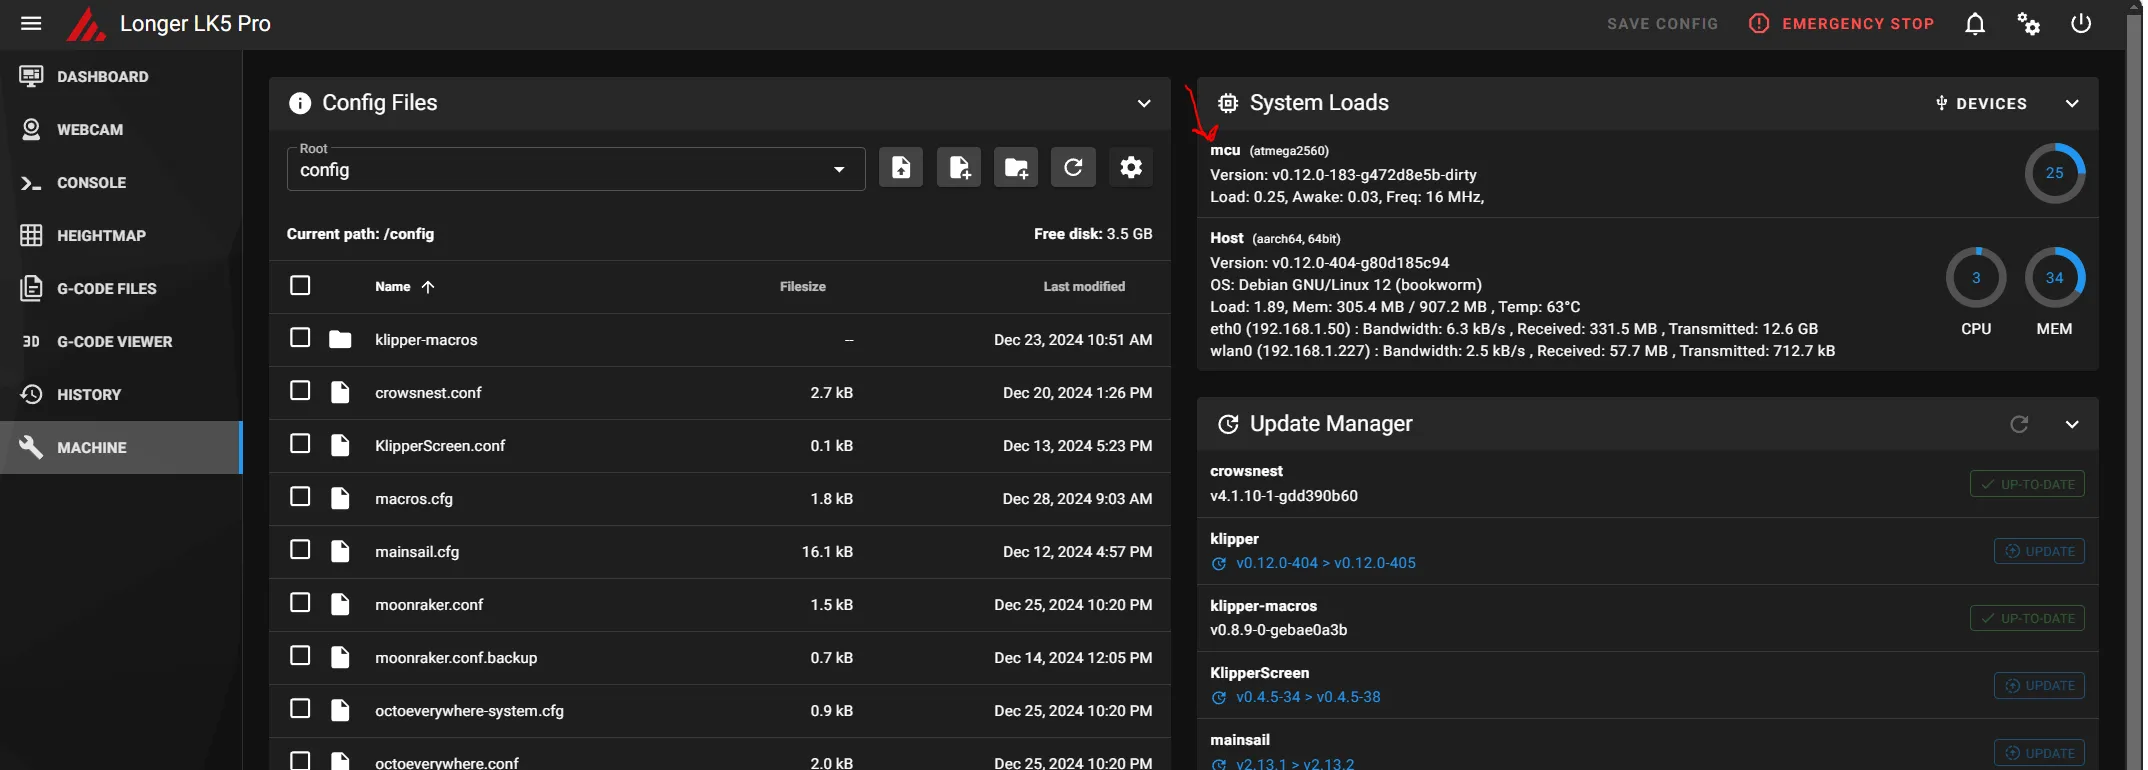
Identify your MCU. There are several ways to accomplish this. My preference is to use the UI. I have mainsail configured, but all the UIs do this, iirc. Select Machine from the menu, then the System Loads section will show you the devices. One will say mcu and have something in parenthesis after like this - mcu (atmega2560).
-
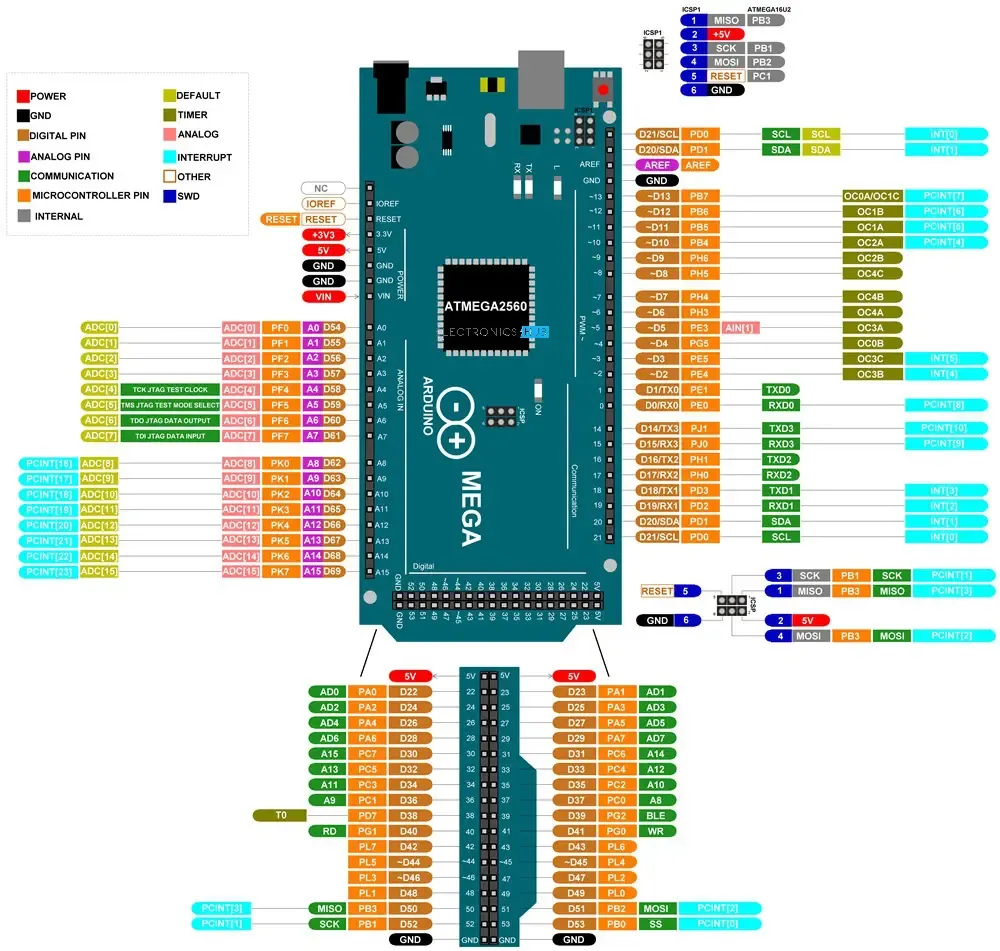
Look up the pinout. You will want to search for something like “atmega 2560 pinout”. I like to use the images filter to make it easier. You’re looking for something that looks like this.
-
Now we just need to find the pins we used (D5, D6) and see what those map to (PE3, PH3).
-
Plug those values into your
OrbiterSensor.cfglike this.
#///////////////////////////filament sensor button macros/////////////////////////////////////////////////
[gcode_button filament_sense]
pin: PH3 # remove the negation "!" for sensor v1 - use just PA9 as example
press_gcode: # sensor released  -runnout detected!
  runnout_init
release_gcode: #gcode macro for filament auto-load, sensor pressed
  filament_load_init
#********************************************************************************************************

#////////////////////////////////////////Filament Unload macros/////////////////////////////////////////////////
[gcode_button filament_unload]
pin: PE3 # Green wire remove the negation "!" for sensor v1 - use just PA9 as example
release_gcode:  # filament unload procedure
  filament_unload_init
press_gcode: # do not add any macro call here
That’s it for this one; I hope this helps someone else! The process was not as difficult as I thought it would be, and I found plenty of help online in forums and reddit. The documentation from orbiter is really good; all I had to do was figure out the pins. I highly recommend this filament sensor and extruder combo!