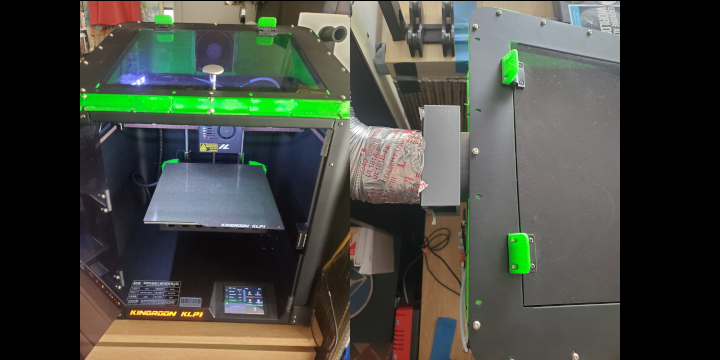
Kingroon KLP1 230 Upgrades
Hi! This post is going to detail all the changes I made to my Kingroon KLP1 230 3D printer. This is a solid printer - especially given the price - but it’s not for those who want a printer that will “just work”. This thing will be good to you if you are good to it, and it only needs a few things to make it reliable.
I have had mine for just over 6 months now and have made a few upgrades; some I consider necessary and others are just because I wanted to. If you have this machine, or a similar one, maybe you will find this useful. I also have much of this on youtube if you prefer video.
Let’s go through the upgrades, starting with the items I feel are required.
Required Upgrades
These are the things I feel are required and really should have been dealt with at the factory.
Runout Sensor
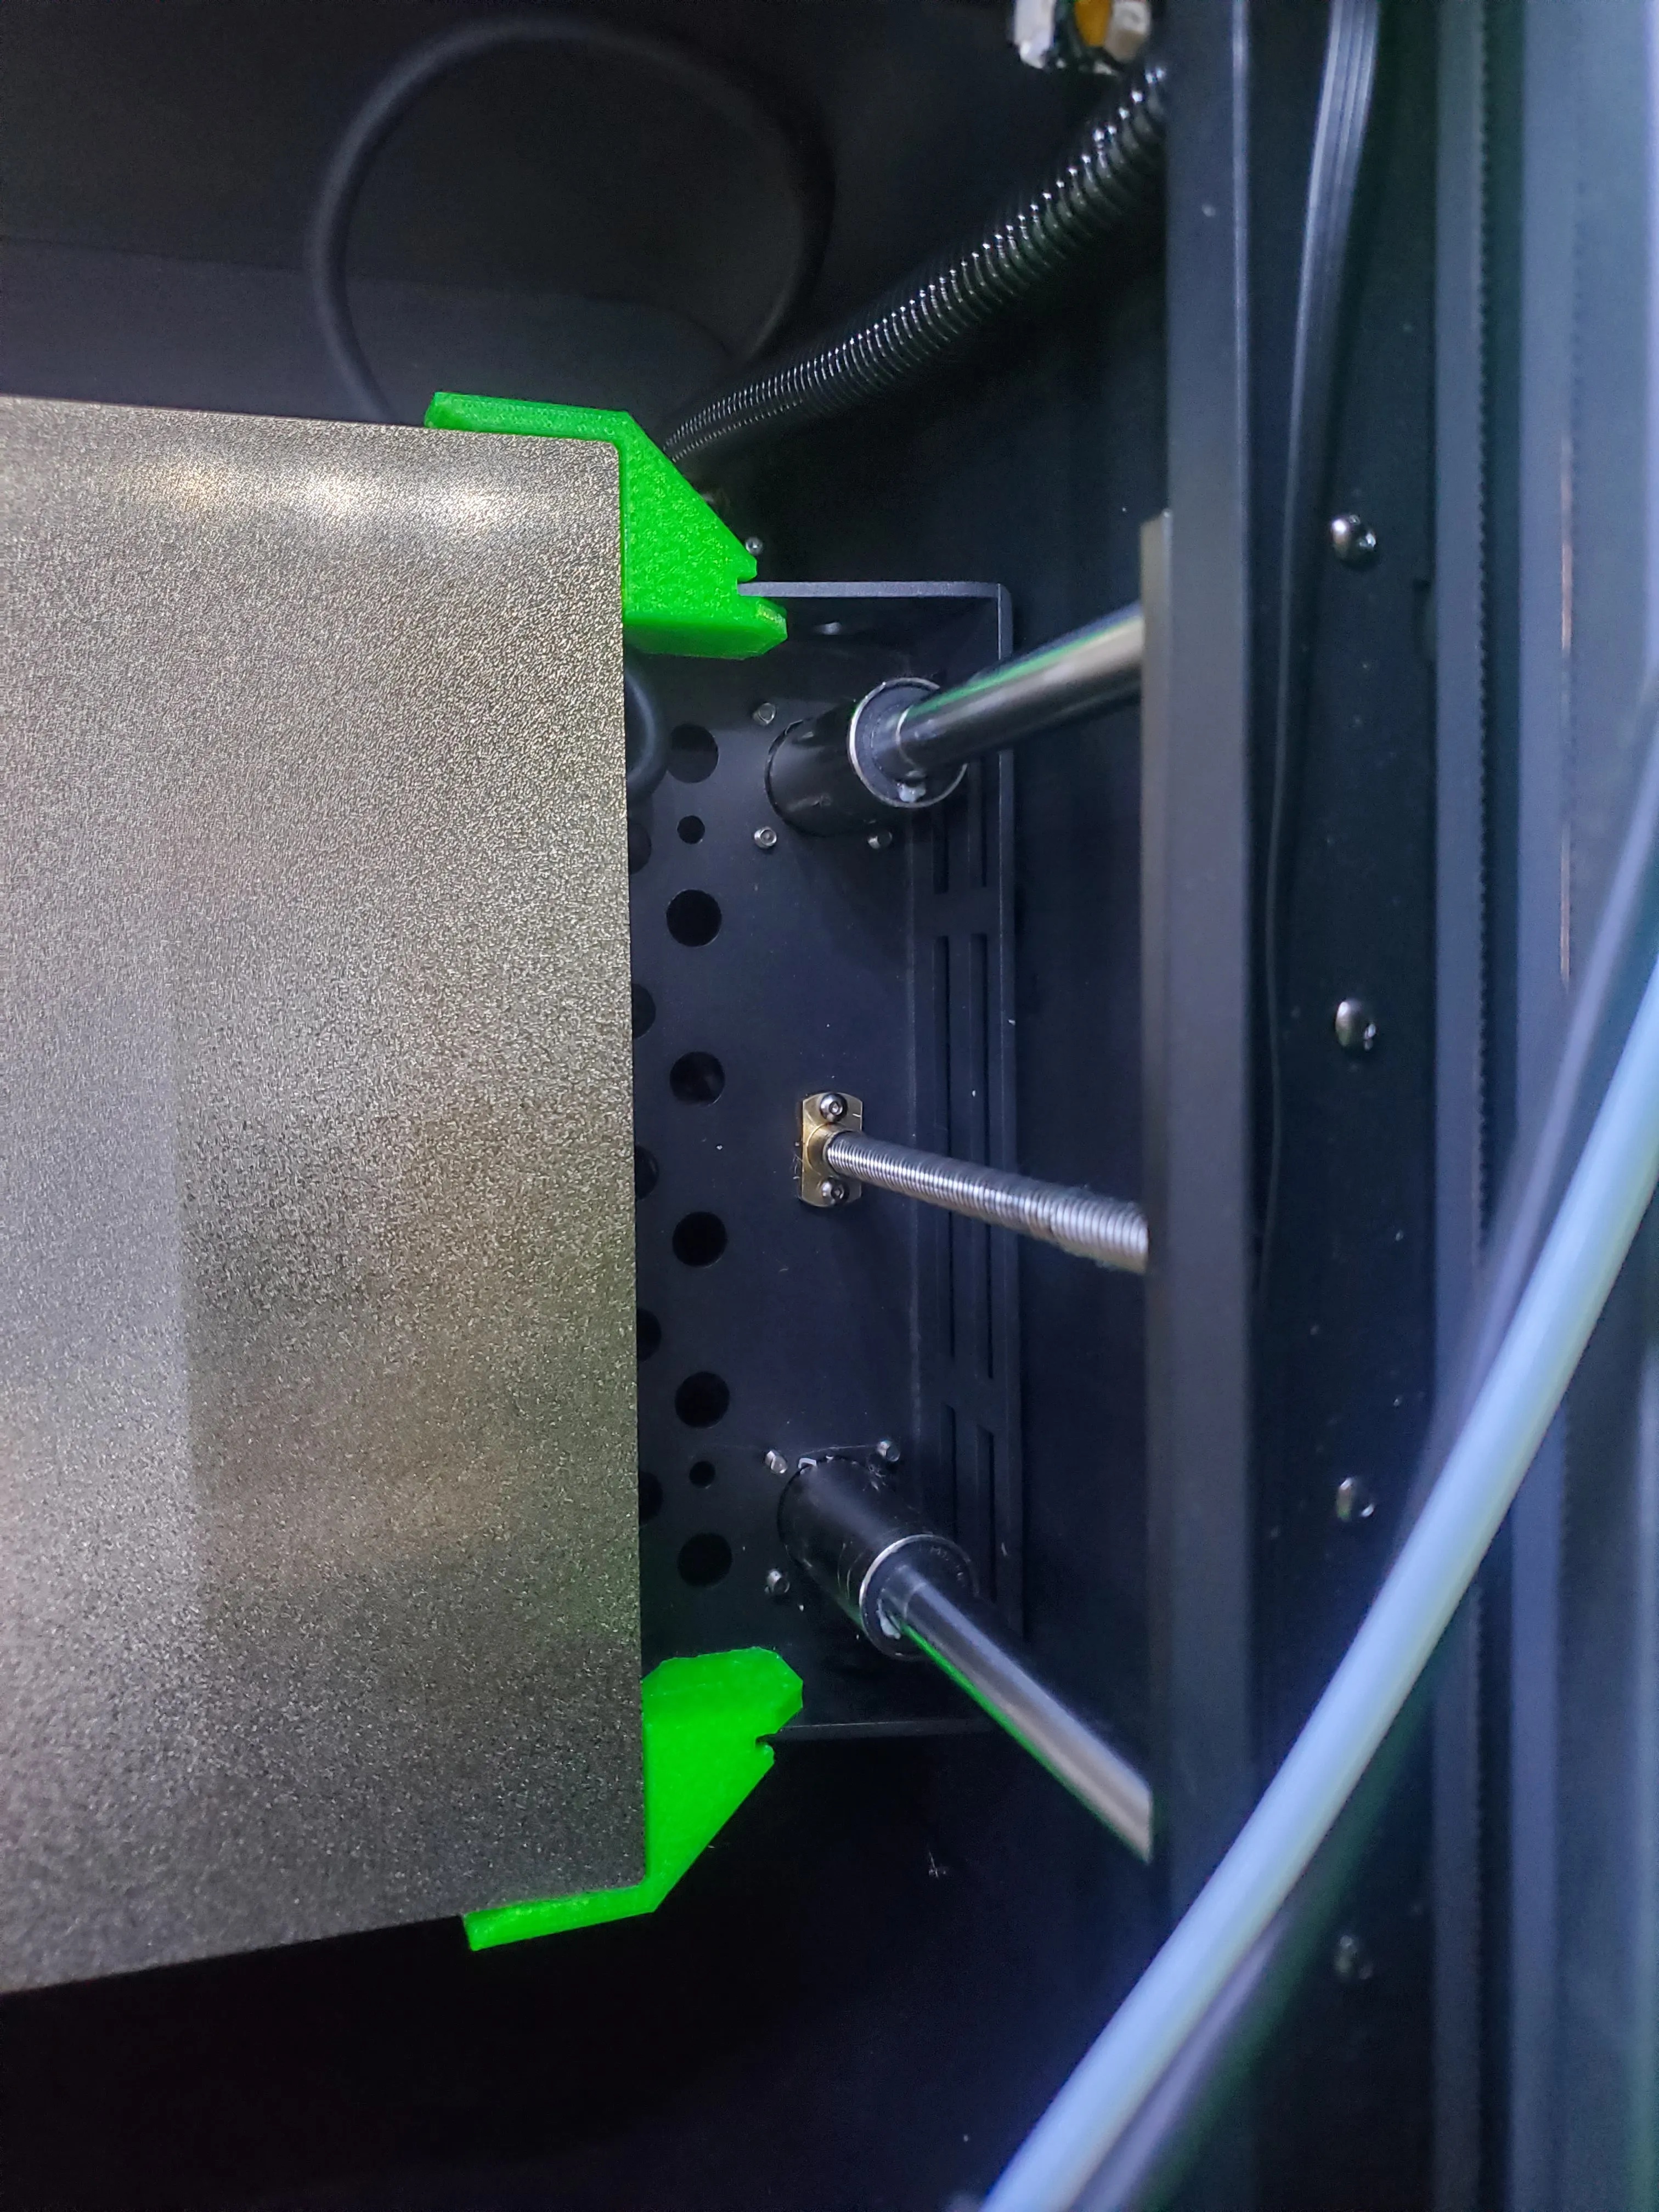
The most glaring issue, or at least the one I noticed first, was the runout sensor. I am not sure how they expected this to work, but there was nothing to hold onto the bowden tube. The path isn’t great either and I had issues with the filament getting pushed down by the switch and getting stuck (the blue arrow in the image below). Usually, you can give the filament a little twist to get it to line up but we can do better.
First Attempt
The first thing I tried was to go online and see what others had made. After a few searches I found this adapter.
| Stock | Upgrade |
|---|---|
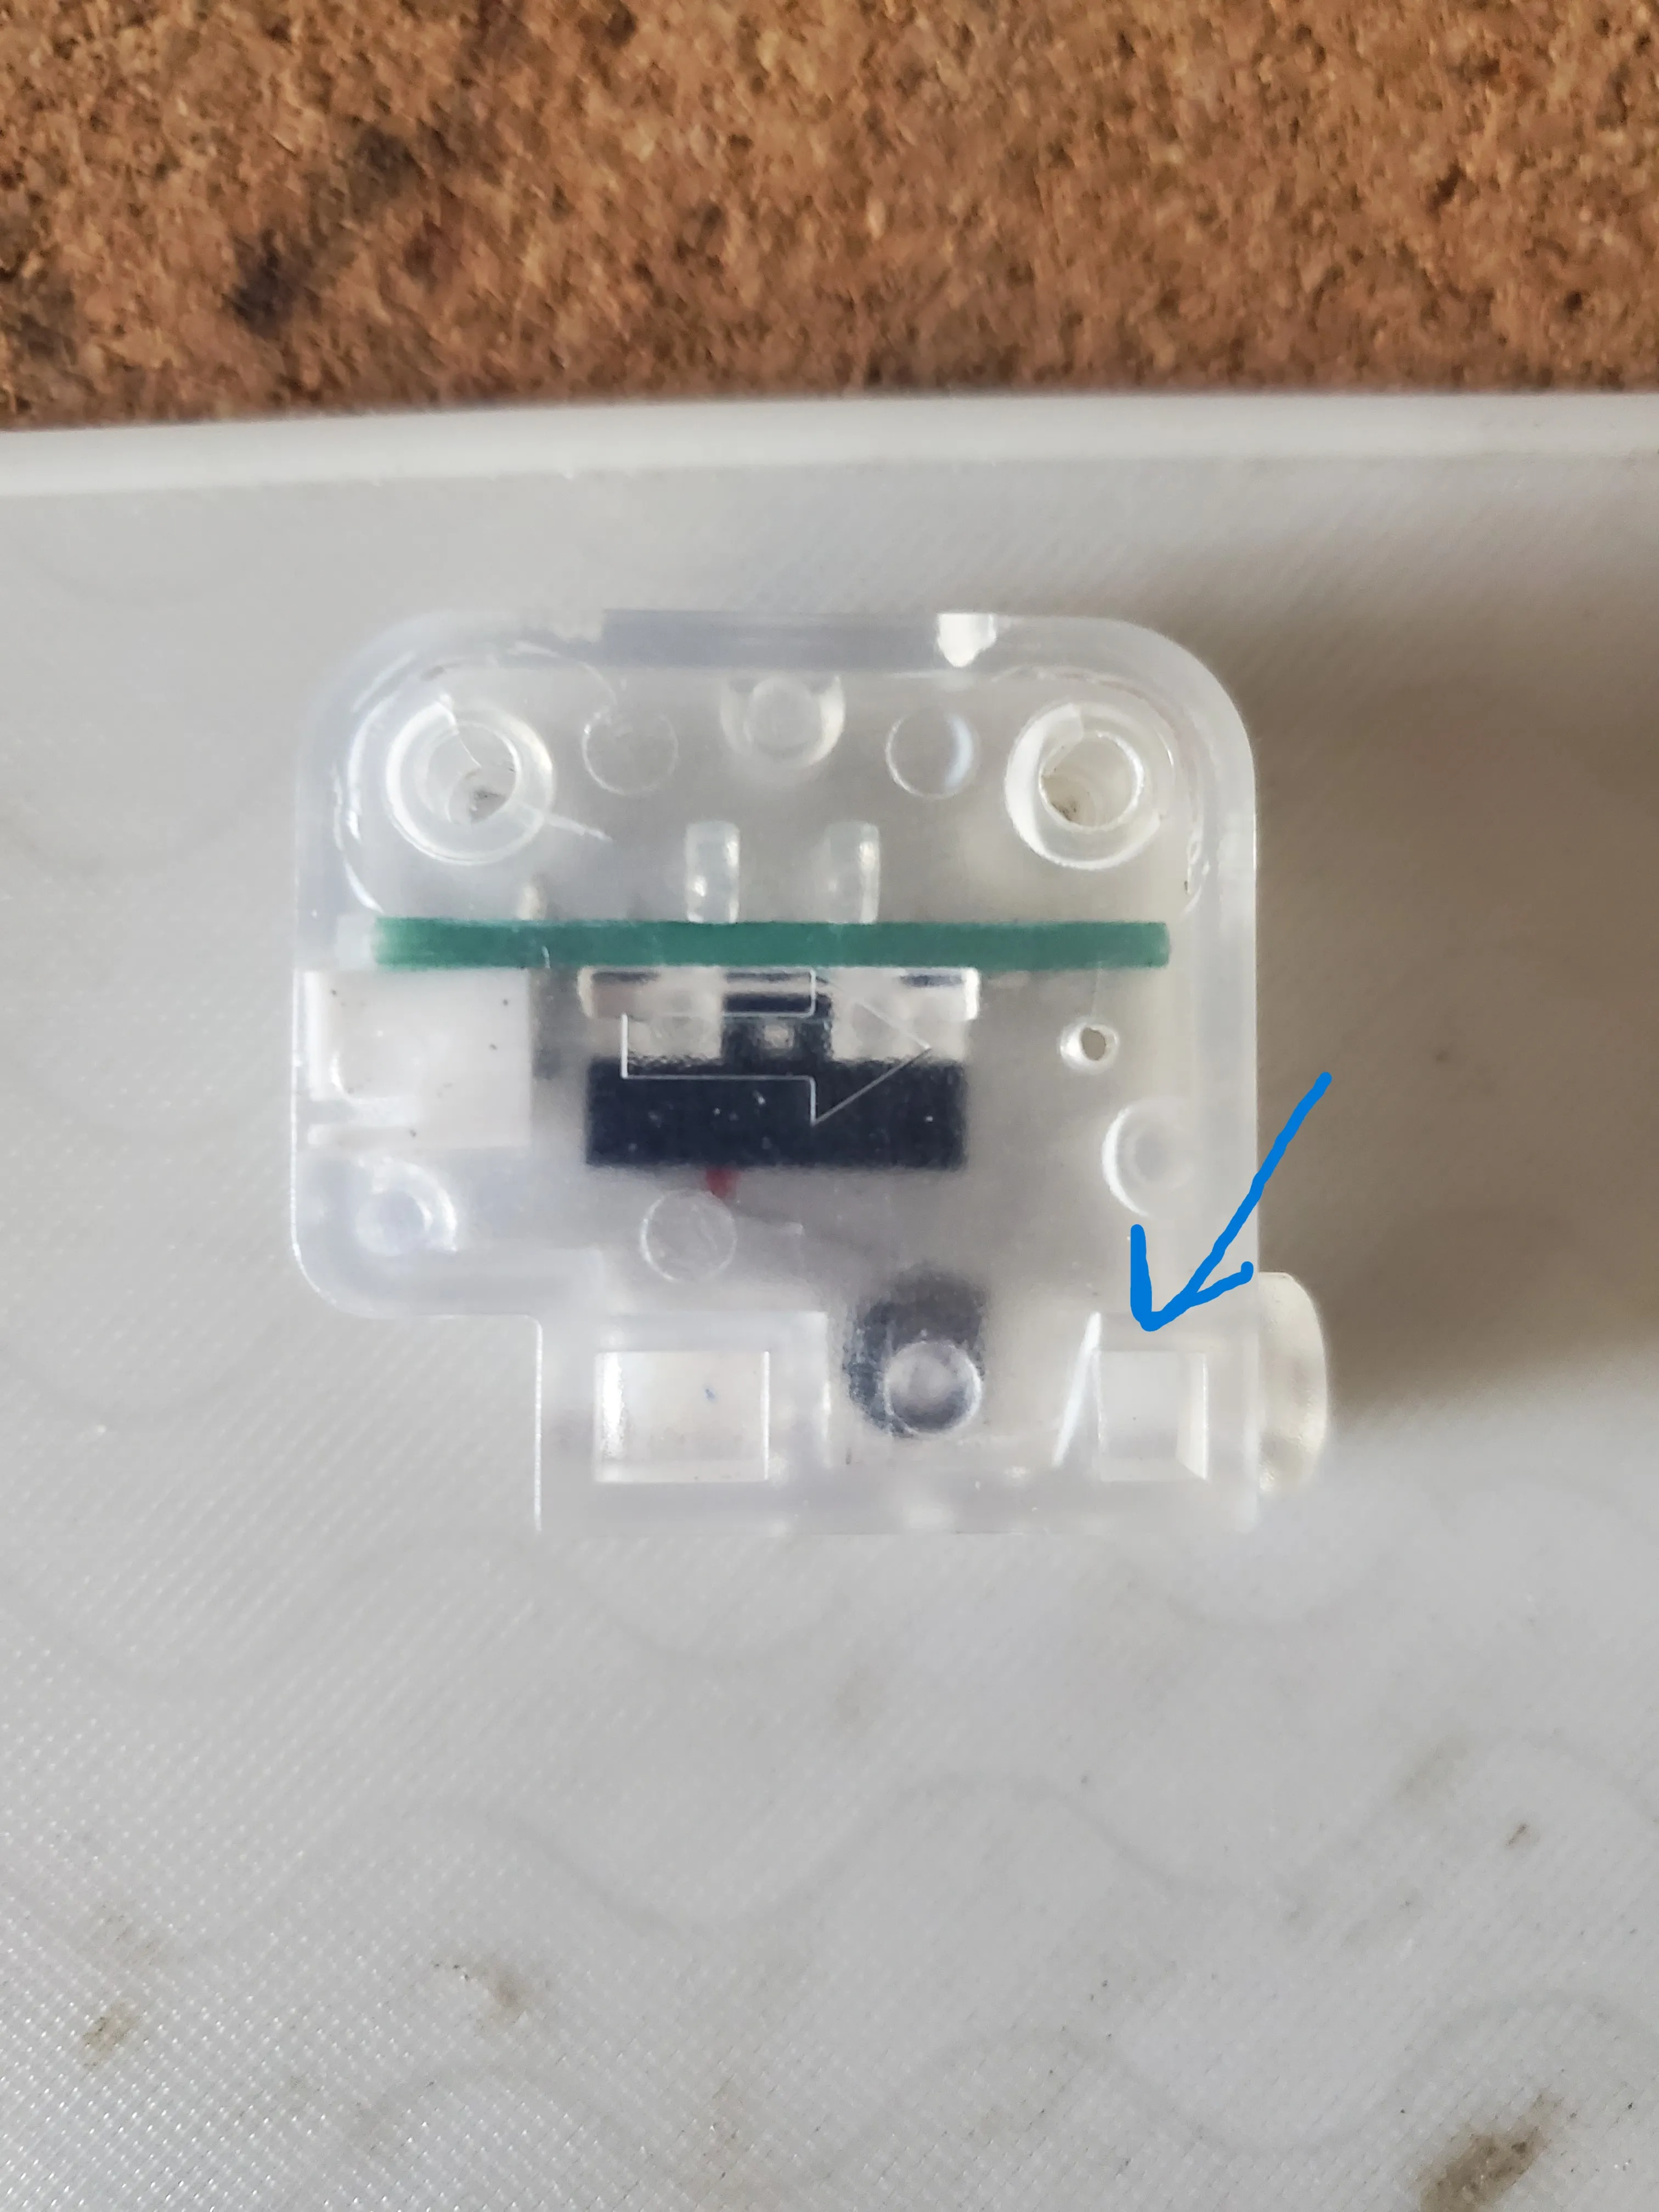 |  |
I liked how it had threads for bowden tube connectors on both sides. I ended up making a slight modification to make the back thinner and fix the screw hole location. There are some small changes like this between the 230 and the older version so be careful if you have this printer and are looking for models. I have a collection on printables that may be helpful. This way you can still use the stock screws. I used this for a while and it was better, but I still had the same problem with the filament getting stuck in the same place. Let’s try again.
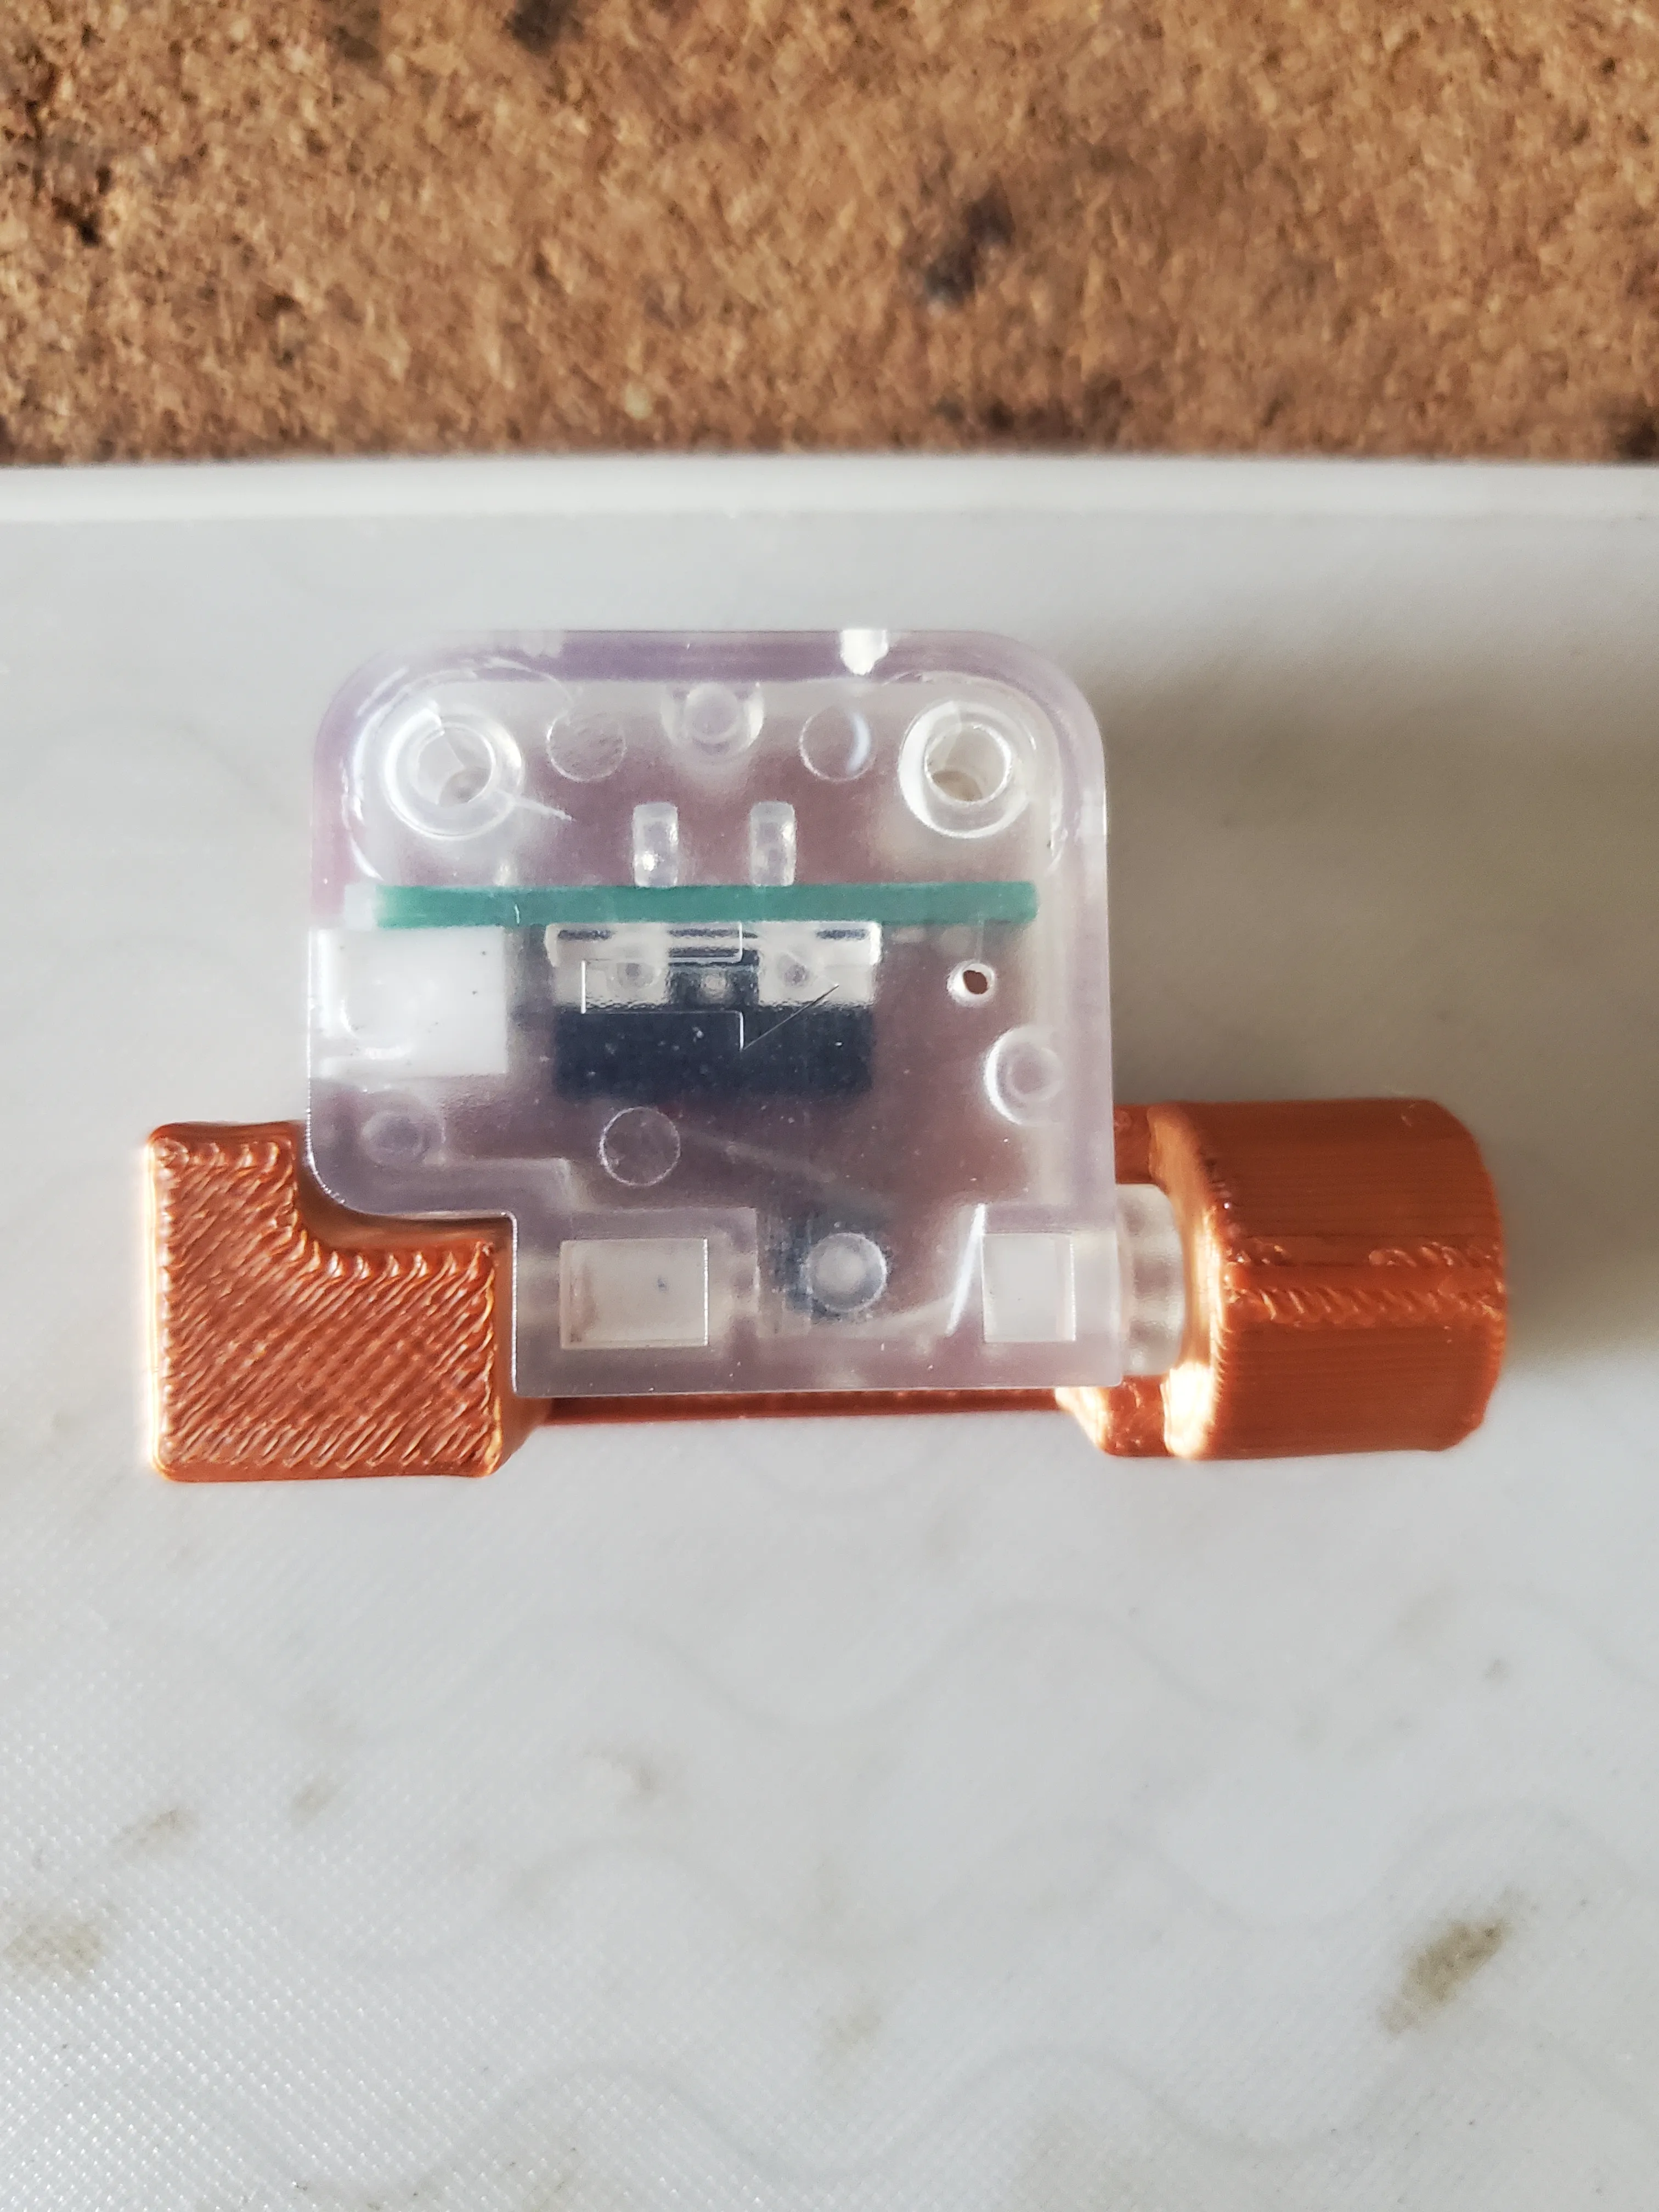
Second Attempt (Current)
I have another printer that I had added a runout sensor to and was very happy with it. It’s a bit bulky but the filament never got stuck. I used my mediocre 3d modeling skills to combine that model with the one I used in my first attempt to arrive at this. I like the original design because it uses a simple and cheap limit switch. Many of us have a few lying around. I had one from my LK5 pro because I upgraded to a 3d touch sensor. I also had some of the bearings lying around from printing fidget spinners for my kids. This isn’t perfect because filament will still get caught up sometimes but it is way better than the stock setup. I like how the angle that the filament feeds in changes because of this design. It works well with the stock spool holder (better than stock, at least!).
| Sensor | Strain Relief/Plug |
|---|---|
 |  |
NOTE: The pinouts can differ. I had to switch 2 pins to get this to work with the KLP1 stock wiring. I used a small pick tool to press down on the retaining clip and slide them out of the connector and swap them. For me it was the pins on either end of the connector. The center pin stayed where it was. I found this out the hard way when I connected it all up and then went to stick the filament in and the printer crashed. I went into the log and saw that it crashed when the filament was detected. This led me to investigate the pinout and they were different. The center wire is usually a ground so I guessed that it would be the outer wires. Once I swapped them everything worked again.
Automation
Now that we have a the sensor hardware sorted, we can add some software changes to really make the most of it. Klipper has the ability to run gcode/macros on certain events for the runout sensor, so we just need to add some gcode to do something when the filament is detected. My filament sensor config:
[filament_switch_sensor runout]
pause_on_runout: True
insert_gcode:
    M118 Filament detected. Loading...
    LOAD_FILAMENT
    RESUME
runout_gcode:
    M118 Filament not detected. Unloading...
    UNLOAD_FILAMENT
    PAUSE
event_delay: 3.0
pause_delay: 0.5
switch_pin:!PA1
Insert
The insert_gcode section is triggered when filament is inserted. I already have a LOAD_FILAMENT macro so we just need to call that.
Runout
The runout_gcode section will be triggered when there is no filament present or the sensor thinks there isn’t. The gcode here is going to push a little filament into the nozzle and then quickly pull it back. This keeps the filament from squishing at the nozzle and hardening a little wider and clogging the bowden tube. You may need to do some adjustment here depending on your printer. Then we pull the filament the rest of the way at a slower speed.
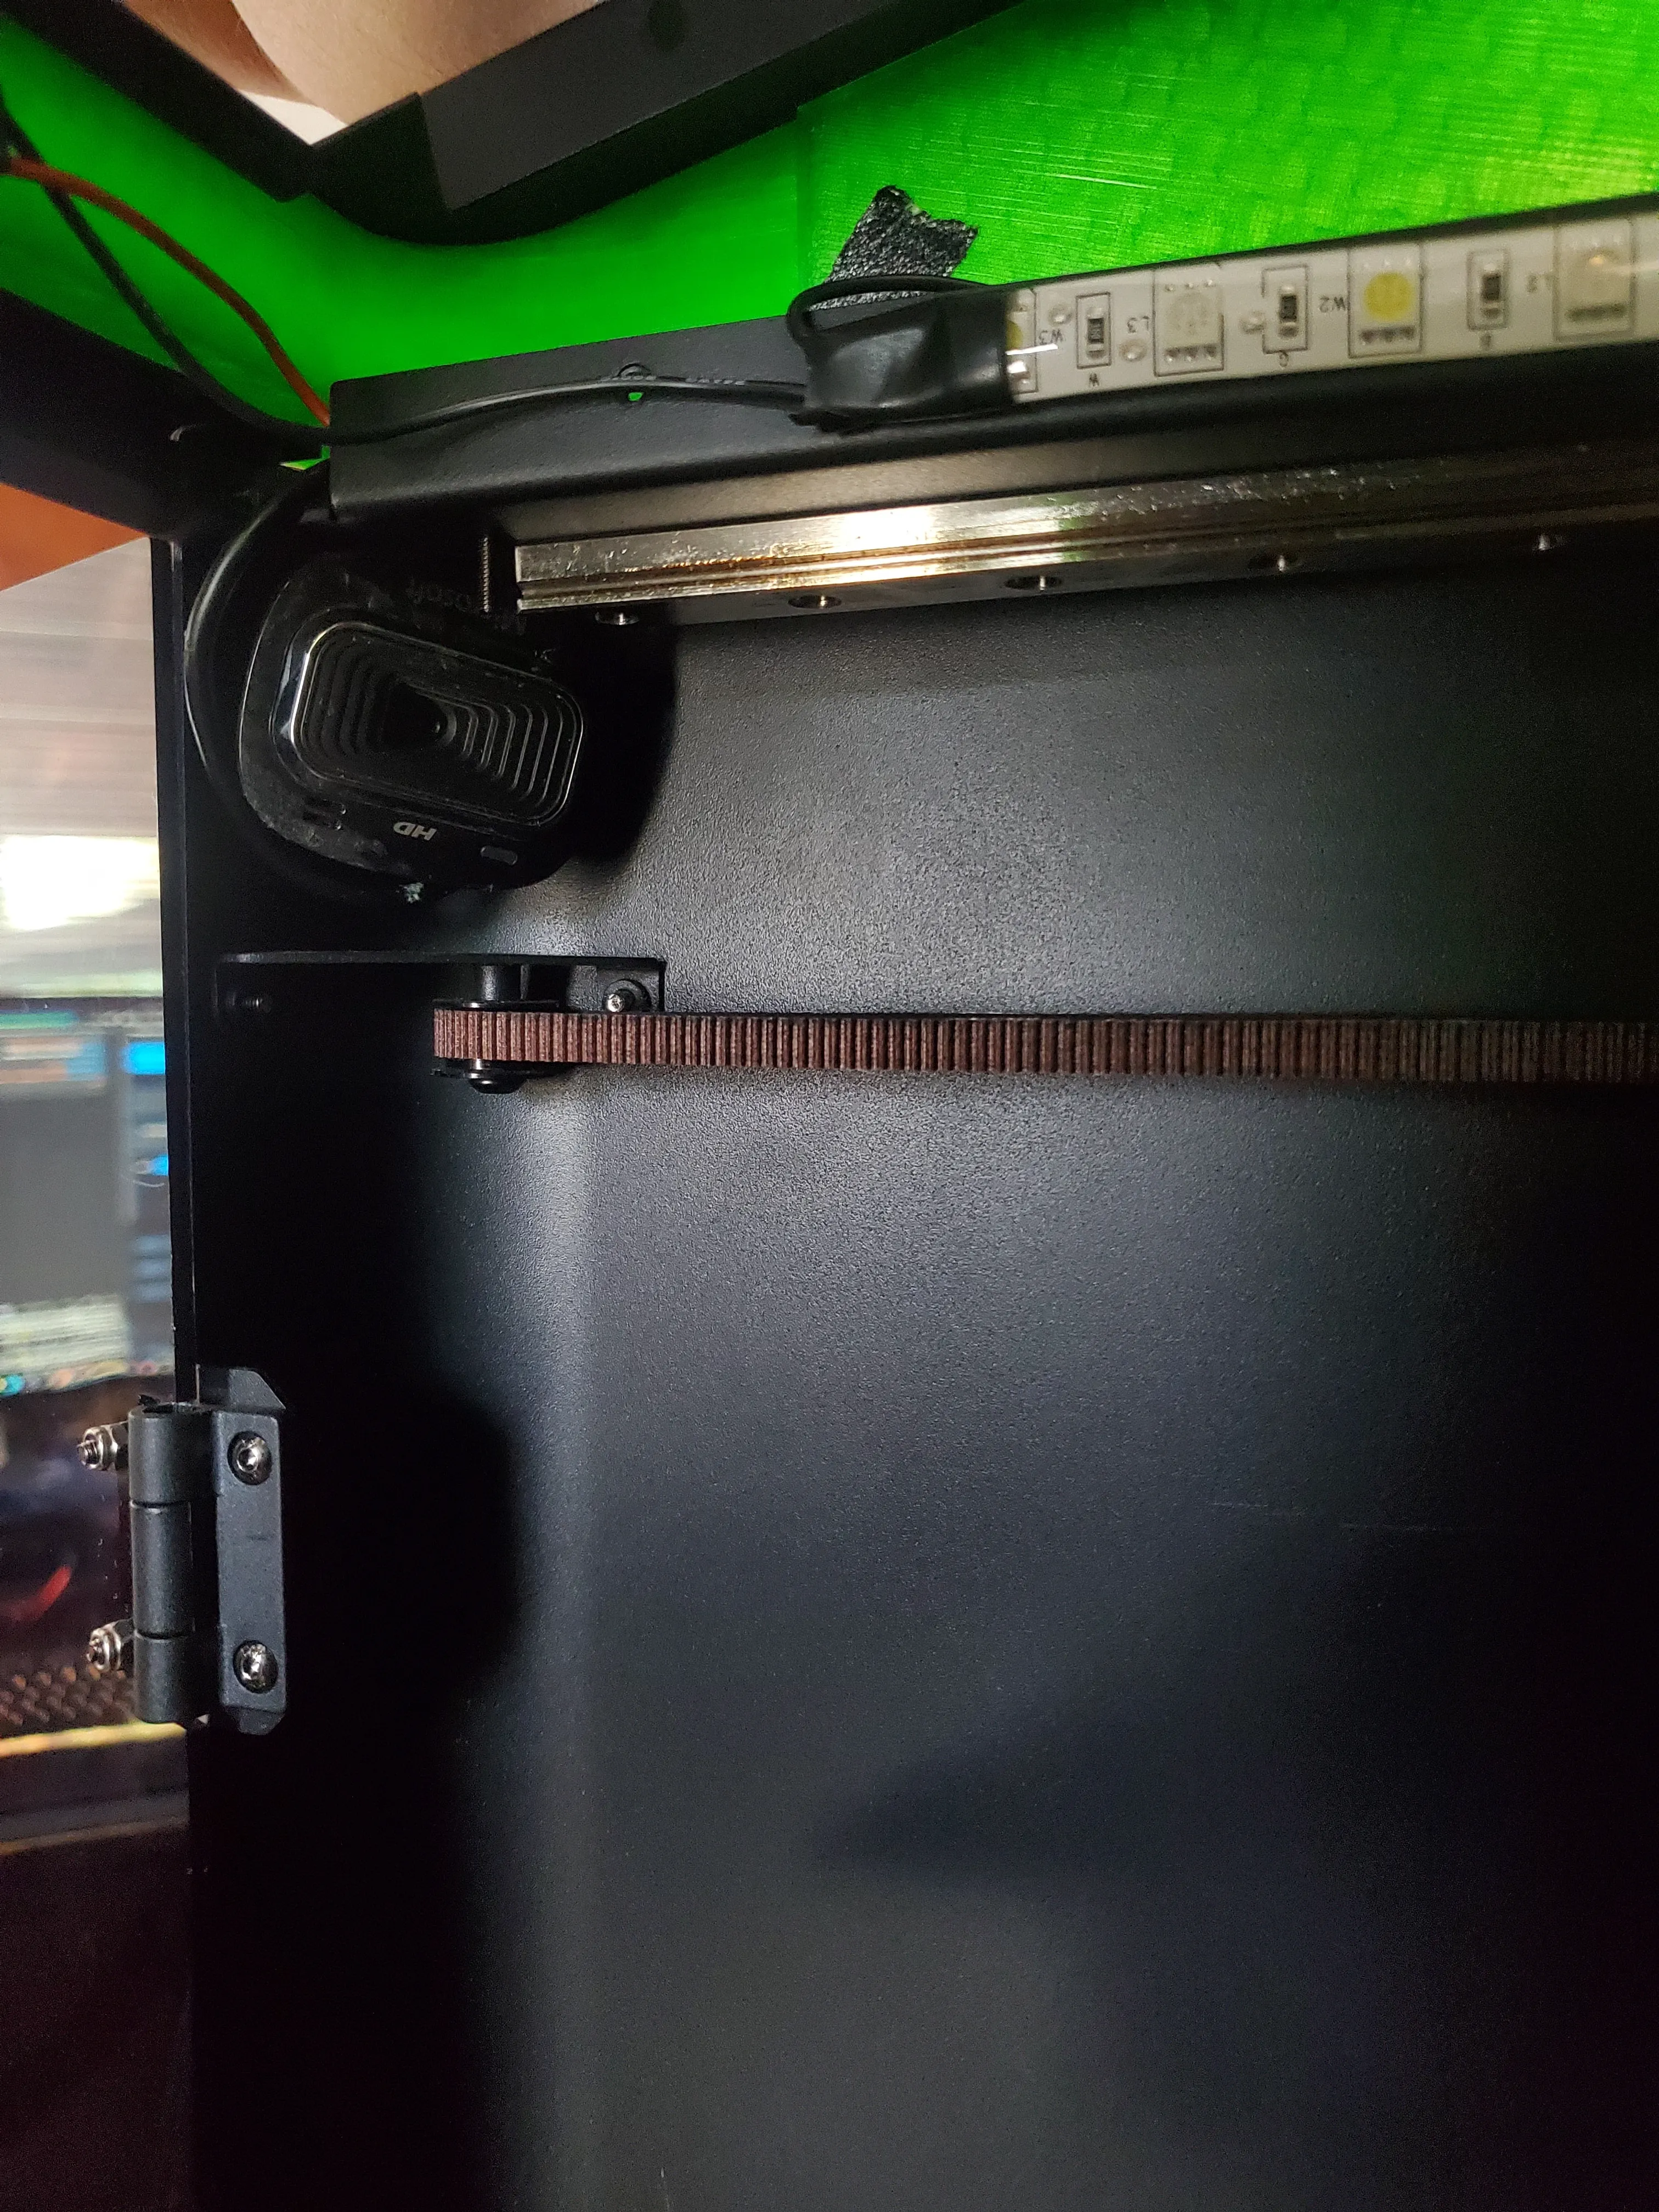
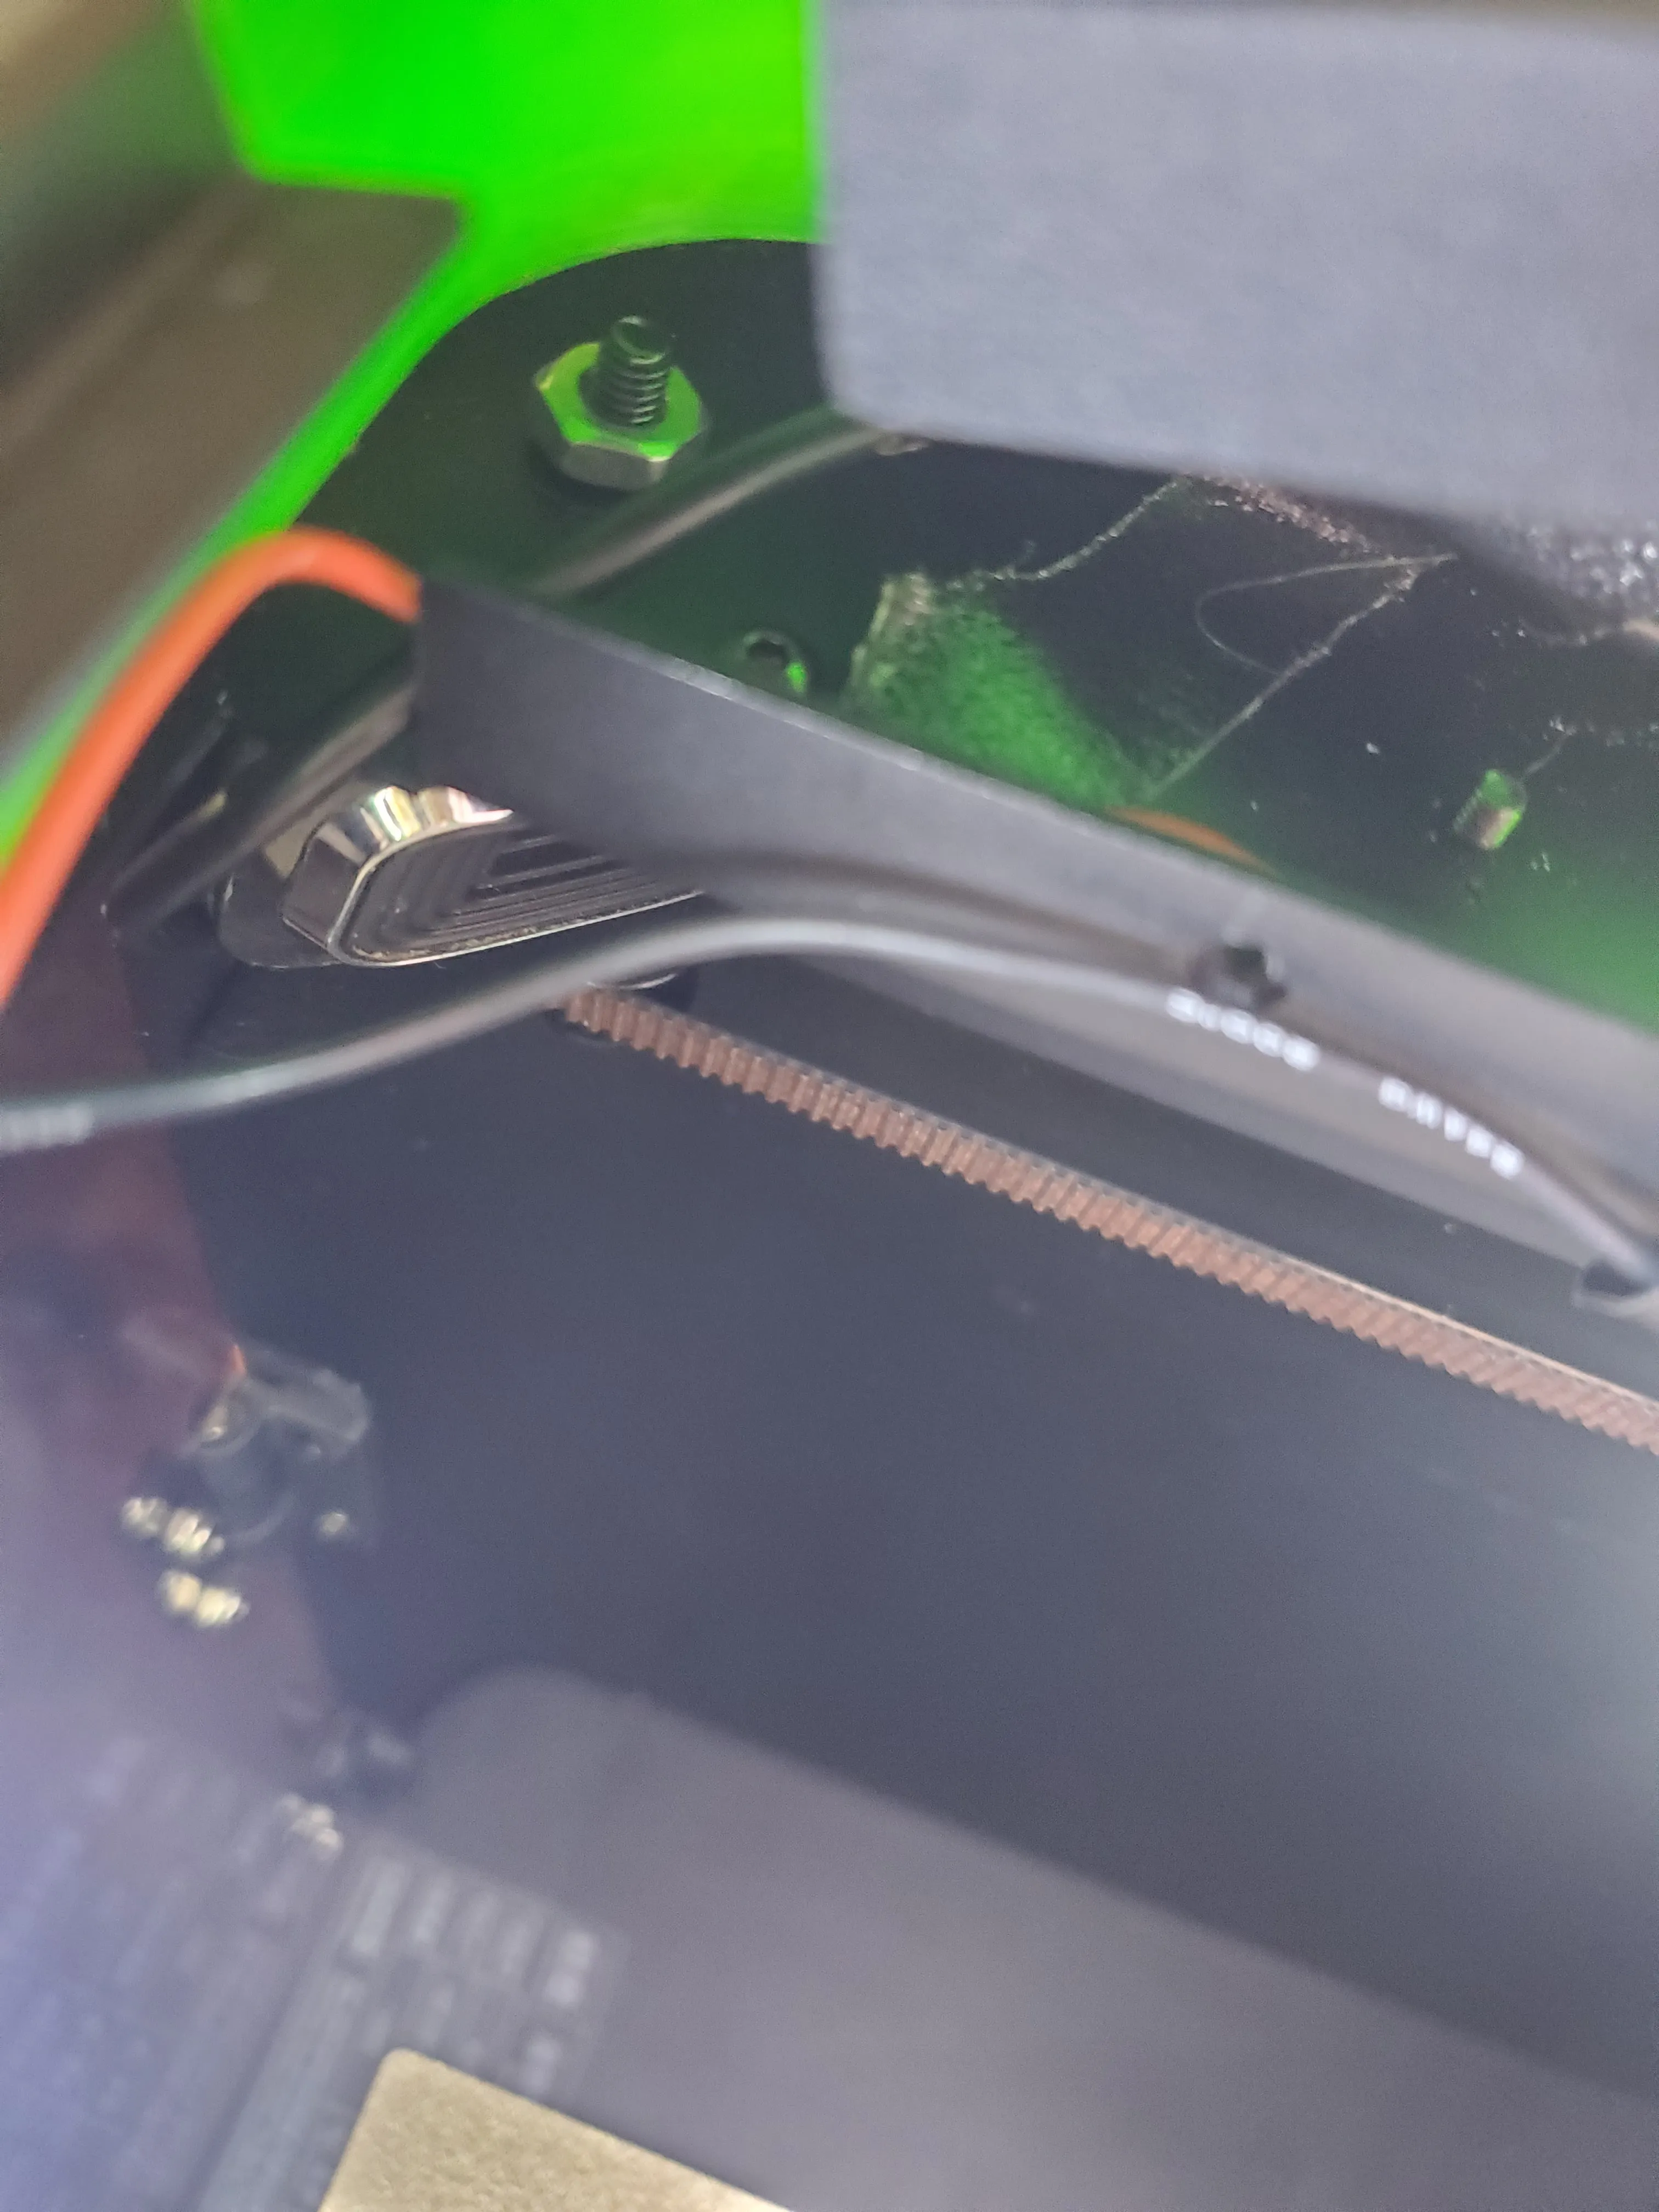
Riser
This is the biggest oversight/issue I have with the machine. From the factory, the lid is far too close to the toolhead, and the wire loom and bowden tube rub on the lid. I have seen reports on reddit where users have rubbed the surrounds off the wire loom to the point where you could see bare copper strands. There are already some good designs out there for the smaller/previous version of the KLP1 that we can use on the 230 version with a little modification.
First Attempt
I used this one first and it was OK. The fit isn’t perfect, and not all the screw holes line up on the 230 because this was designed for the older 210 model. I found that wasn’t a big deal and was able to get it to work with a little man-handling and about half the screws.
 But…I wanted a bit more room to add a fan, lights and camera so…
Second Attempt (Current)
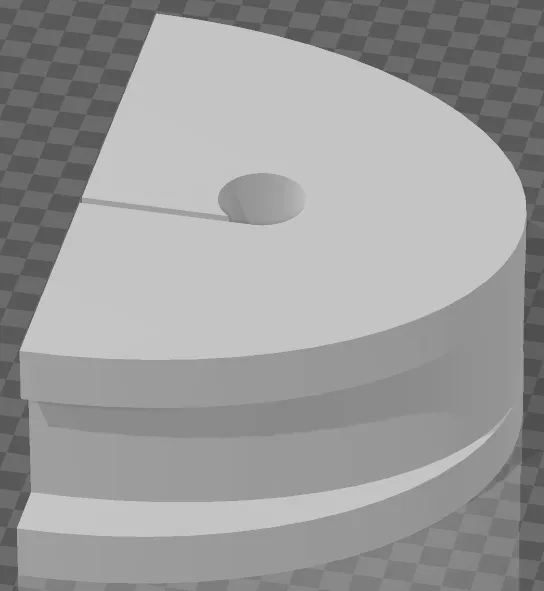
I came across another riser upgrade that looked more like what I wanted. The angle makes it so there is a large amount of headroom so wires and bowden tube don’t rub on the lid. There is also a model with a camera mount. I didn’t use the mount but I did print the model because I wanted to make use of the hole for cable management. The camera wire has a filter on it and that makes the diameter larger. To get it to work I had to modify the shape. I turned it into more of a “D” shape using a Dremel tool with a round sandpaper bit. It looks like this.
I also designed a plug/stress relief for it. It will only fit if you make the hole bigger in the same way I did. You could also design your own. I print these out of TPU with really low infill, like 5%, so that they squish and install easily.
Here is the whole unit.

Plate Stopper
The magnetic PEI build plate is a nice feature but it is difficult to align properly. Again, the community provides an answer! These stops are not a perfect solution, but they help a ton. And, of course, I had to use the same green PETG filament.
 | 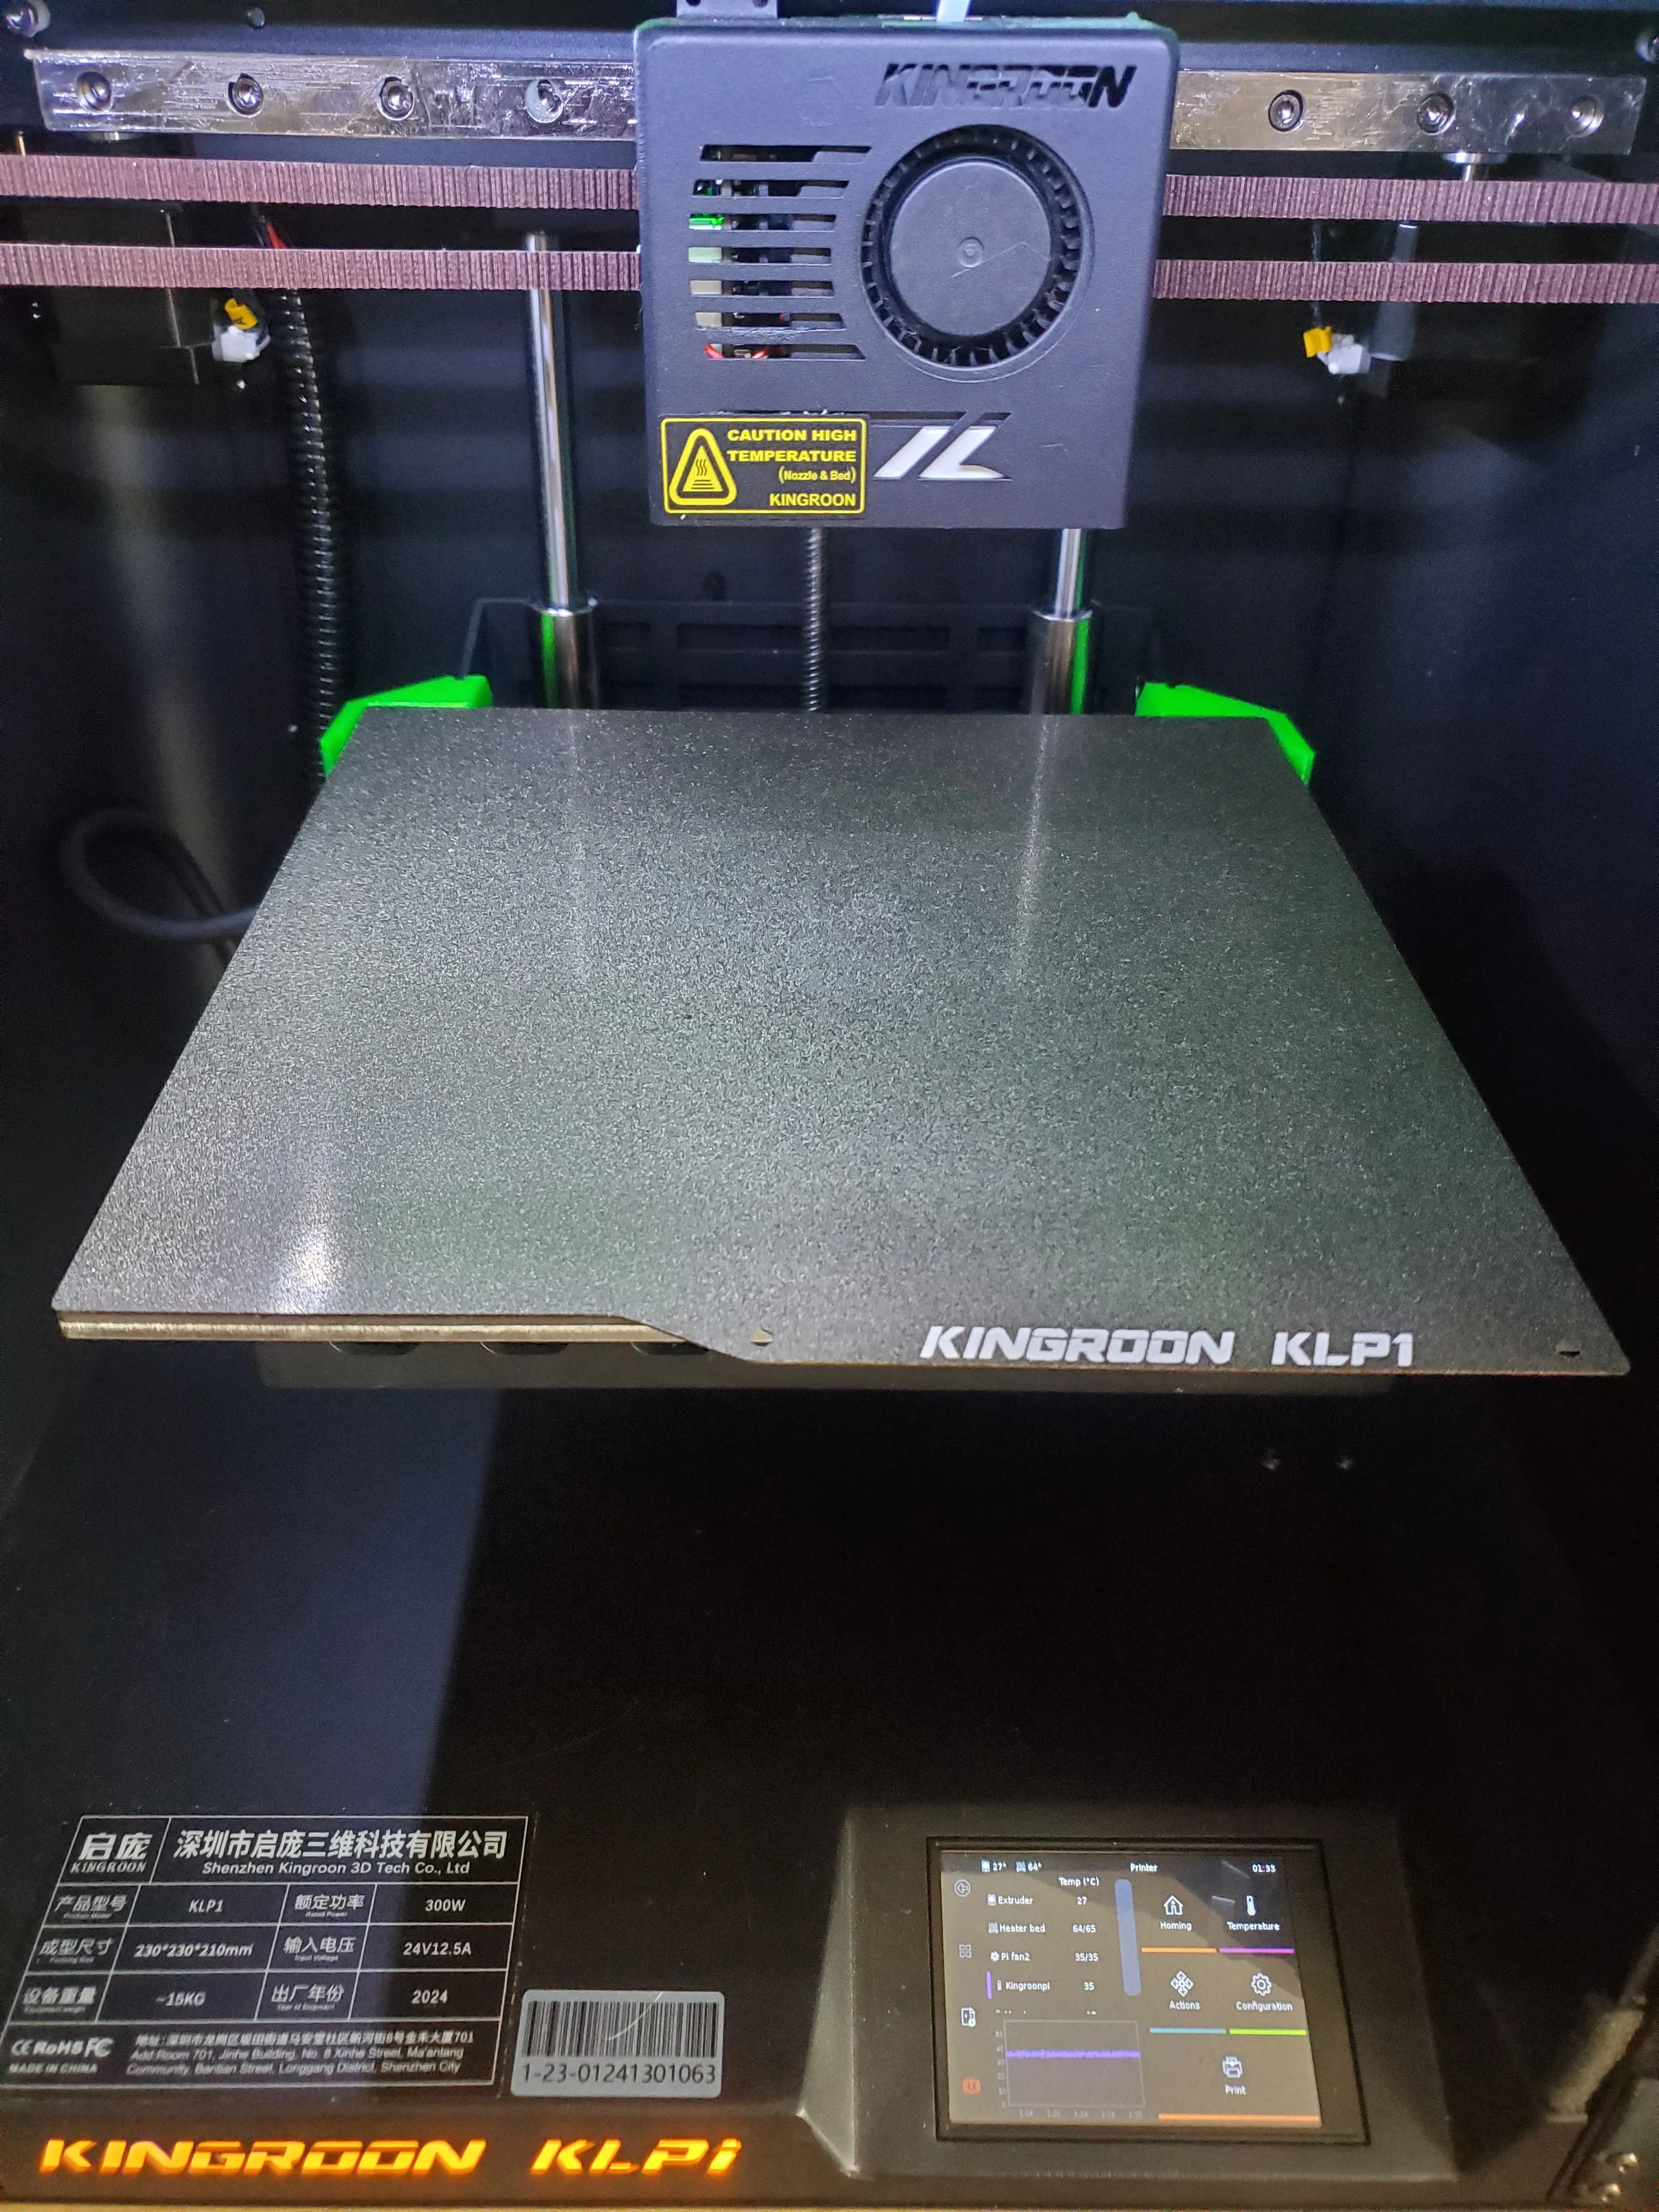 |
I guess you could drop some CA or hot glue on them to keep them in place, but I don’t want to make it that permanent. I use one hand to keep one of the stops in place while I use the other hand to slide the plate back and drop it into place. This is so much easier than stock, especially when the bed is still hot!
Required for Volatile Materials
I wanted to start printing filaments like ABS and ASA but they have VOCs and require filtering. This is what I have done to make the KLP1 better suited for the task.
Exhaust Fan with Filter
This ended up being a bigger project and I am going to do a separate blog post for it. I will update this with the link when it is posted.
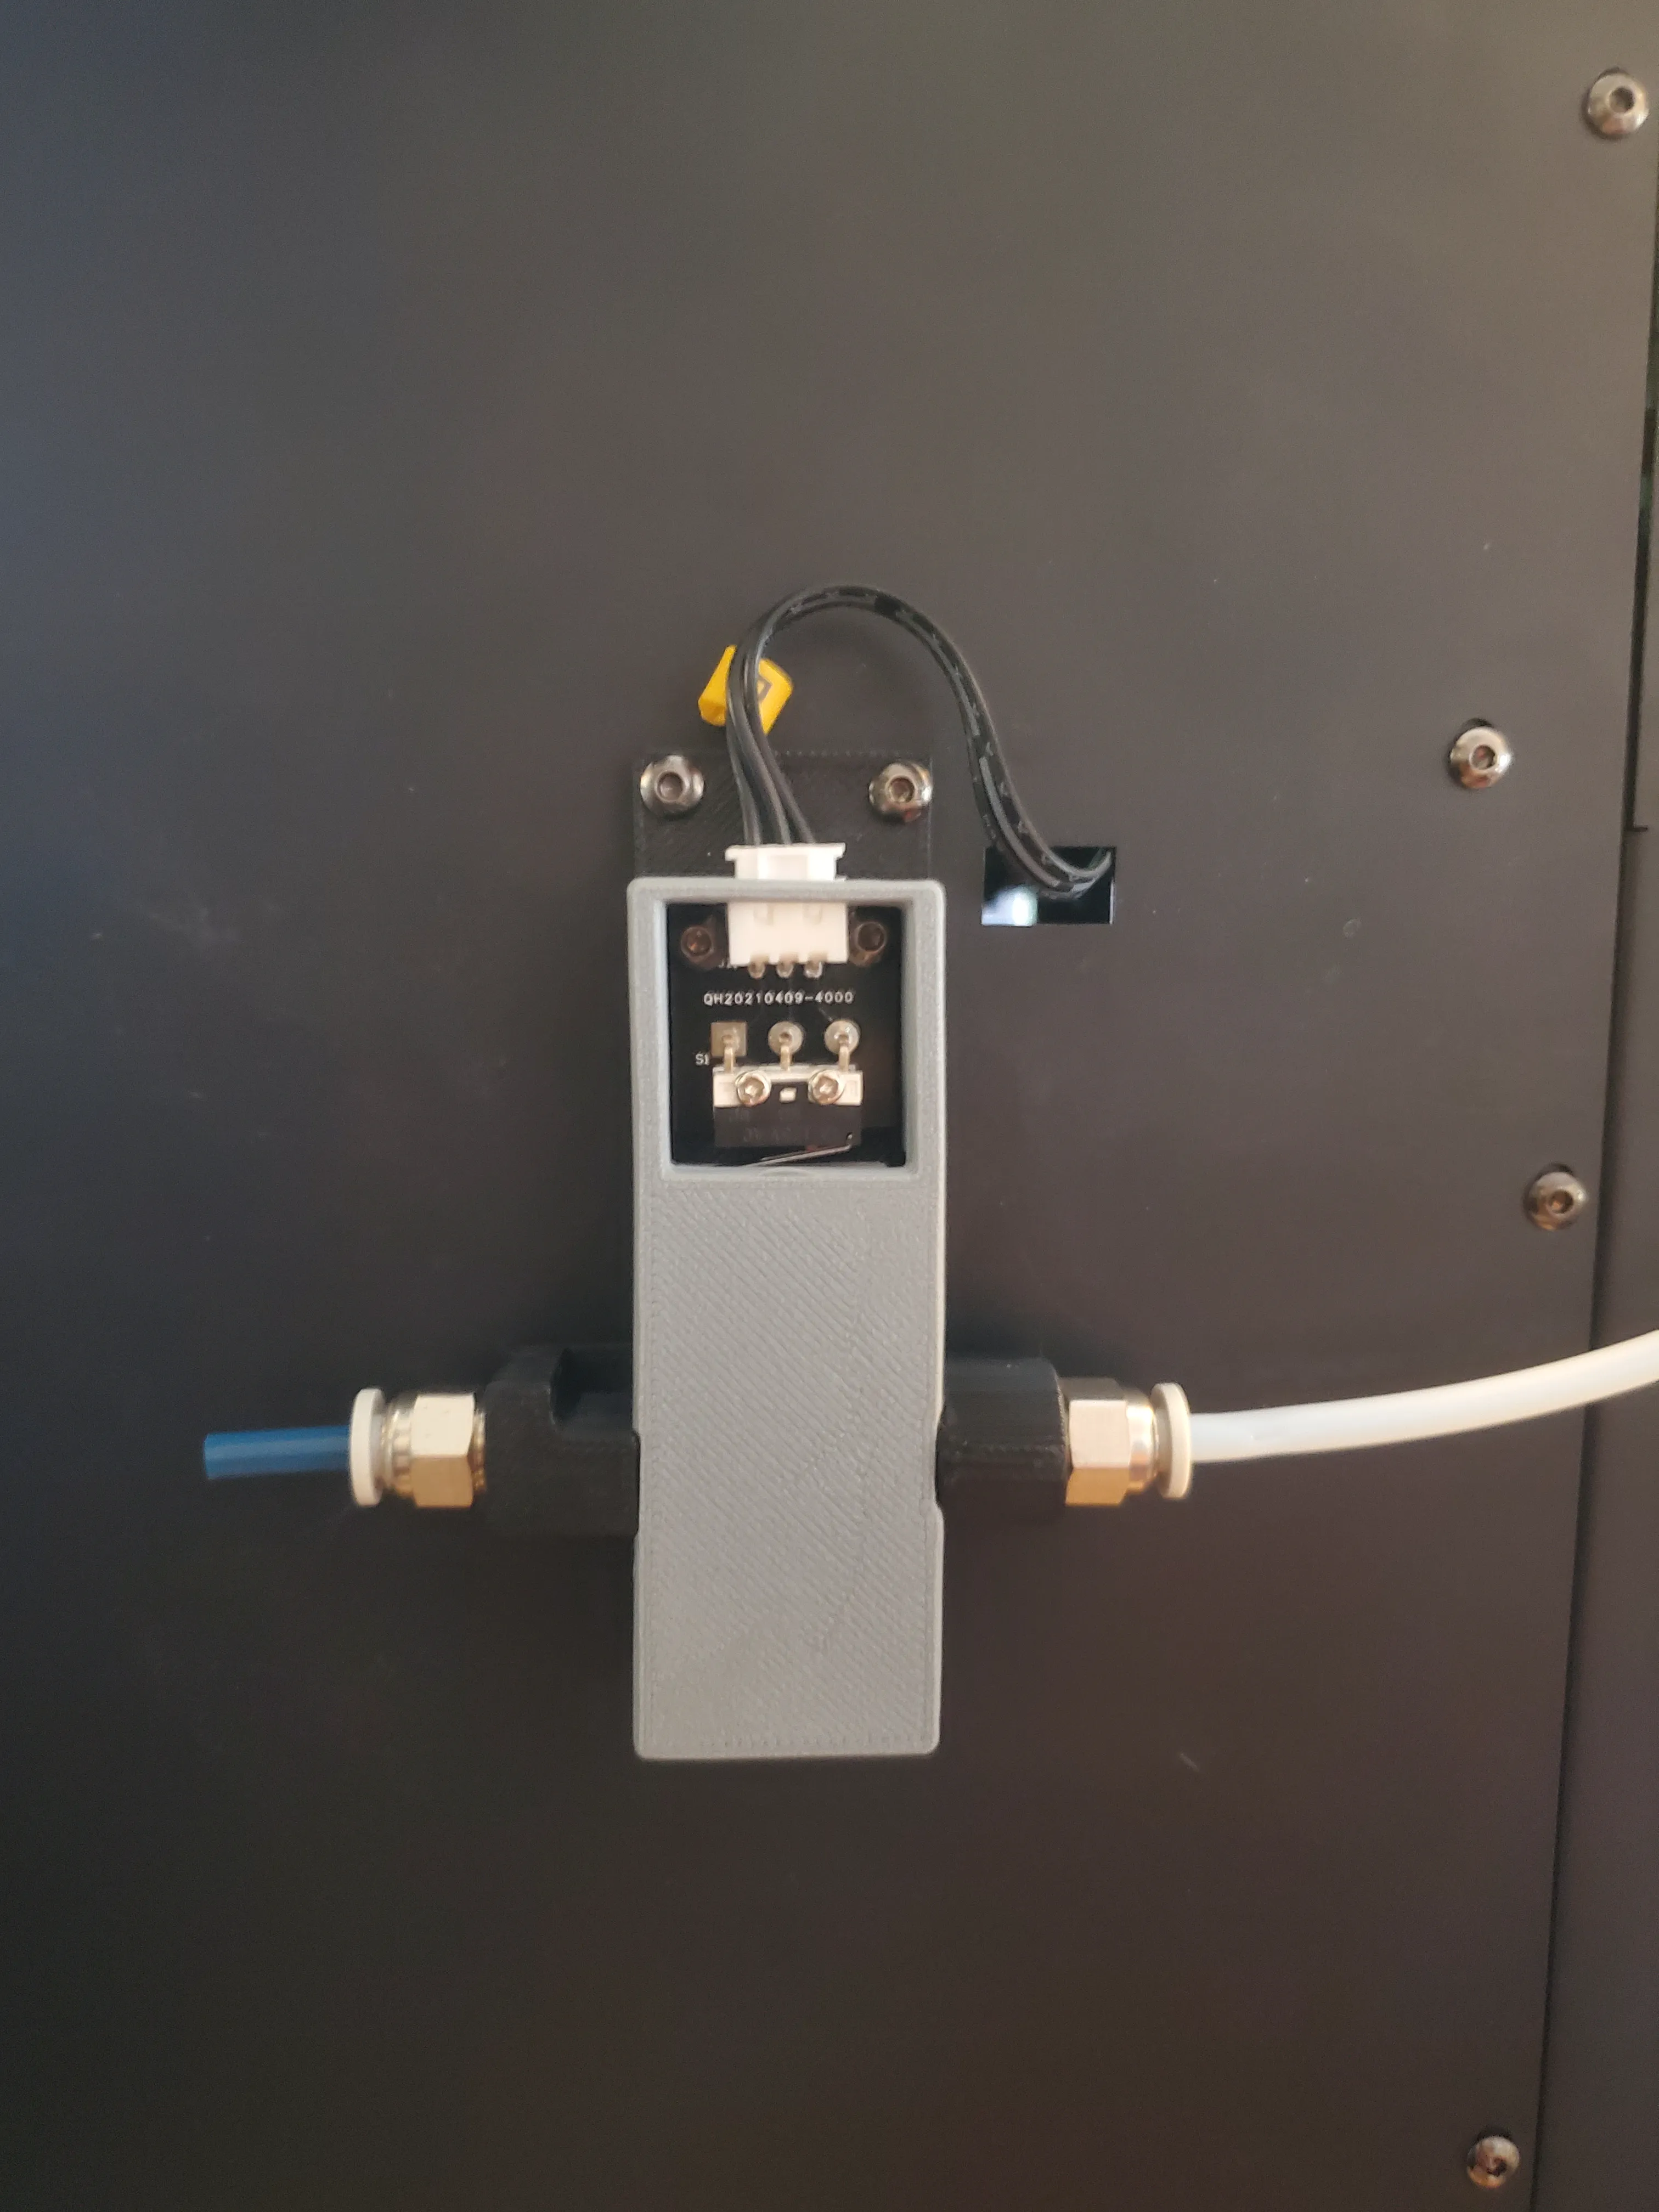
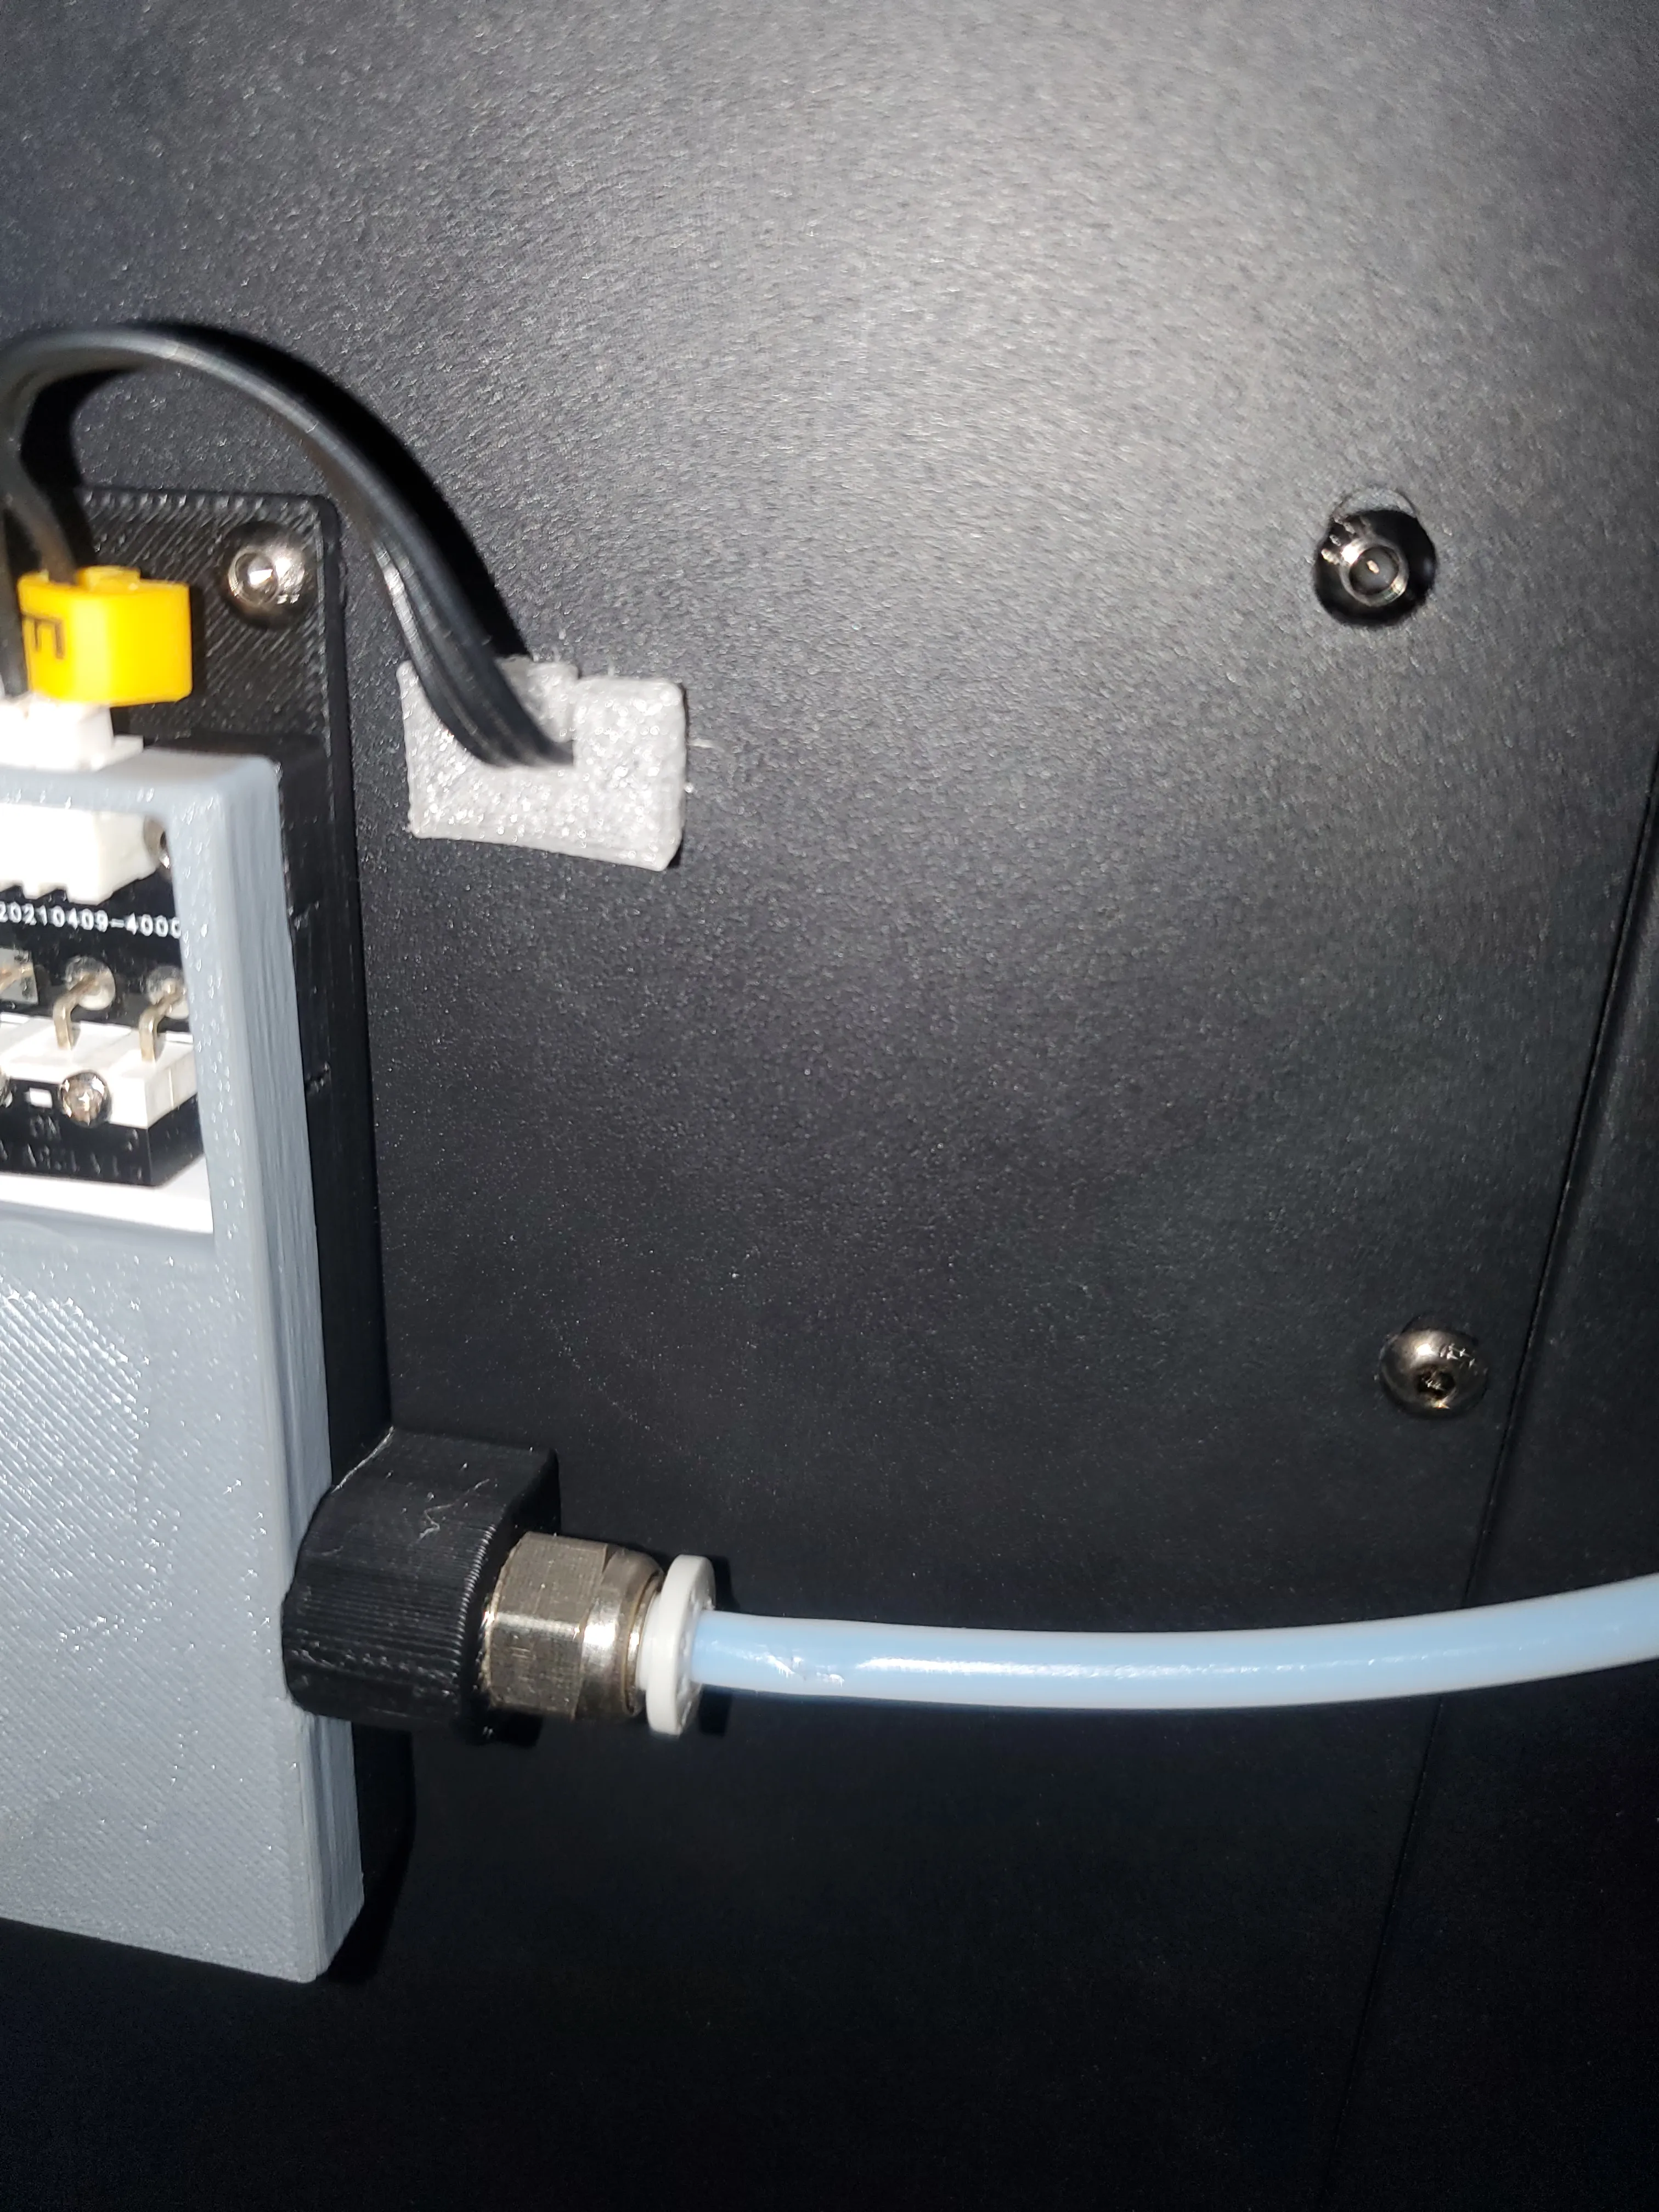
Chamber Temperature Sensor
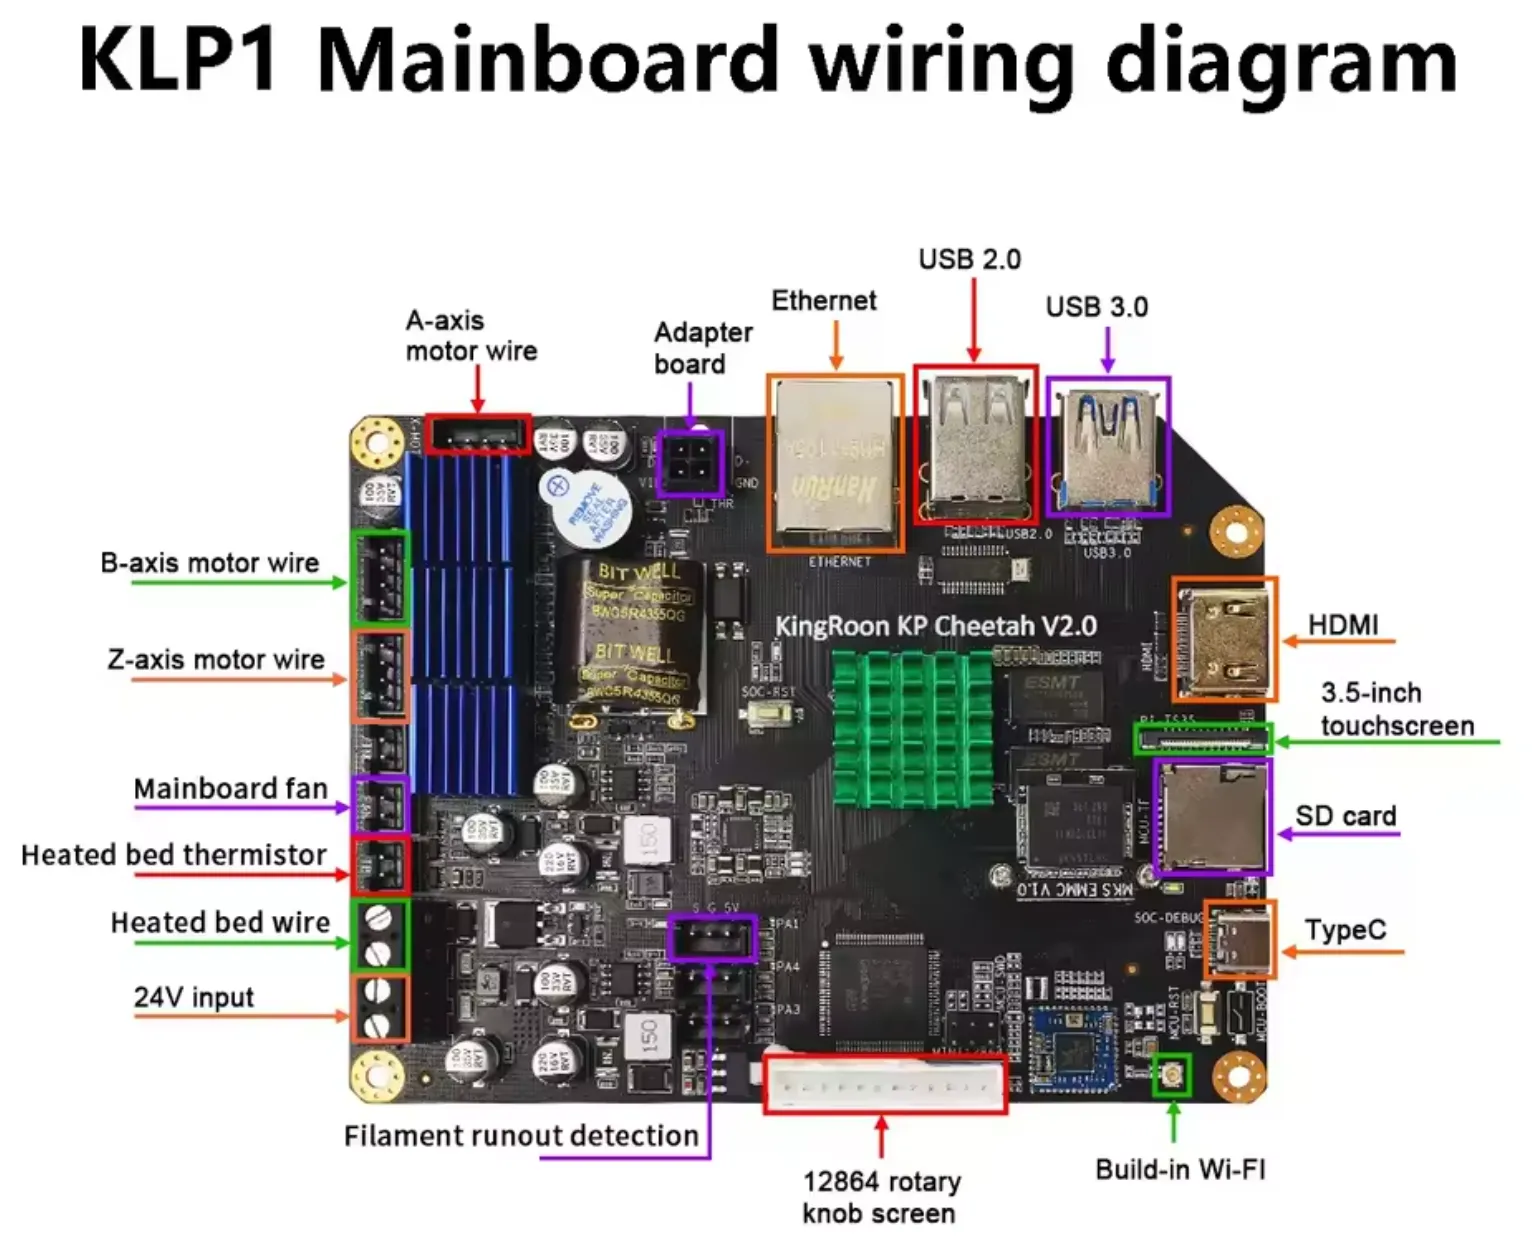
Many materials can benefit from having a constant temperature in the chamber. The KLP1 already has an enclosed chamber so we just need to add a thermistor to read the temp. These are relatively cheap and available and I bought a 5 pack a while back when one of mine broke and had to be replaced. As seen in the wiring diagram, I am using one of the ports (PA3) for the sensor. I also added this section to the klipper config to get it working.
[temperature_sensor chamber]
sensor_type: Generic 3950
sensor_pin: PA3
min_temp: 0
max_temp: 100
gcode_id: C
NOTE: Do not use NTC 100K beta 3950 as it has been deprecated.
The completed setup.
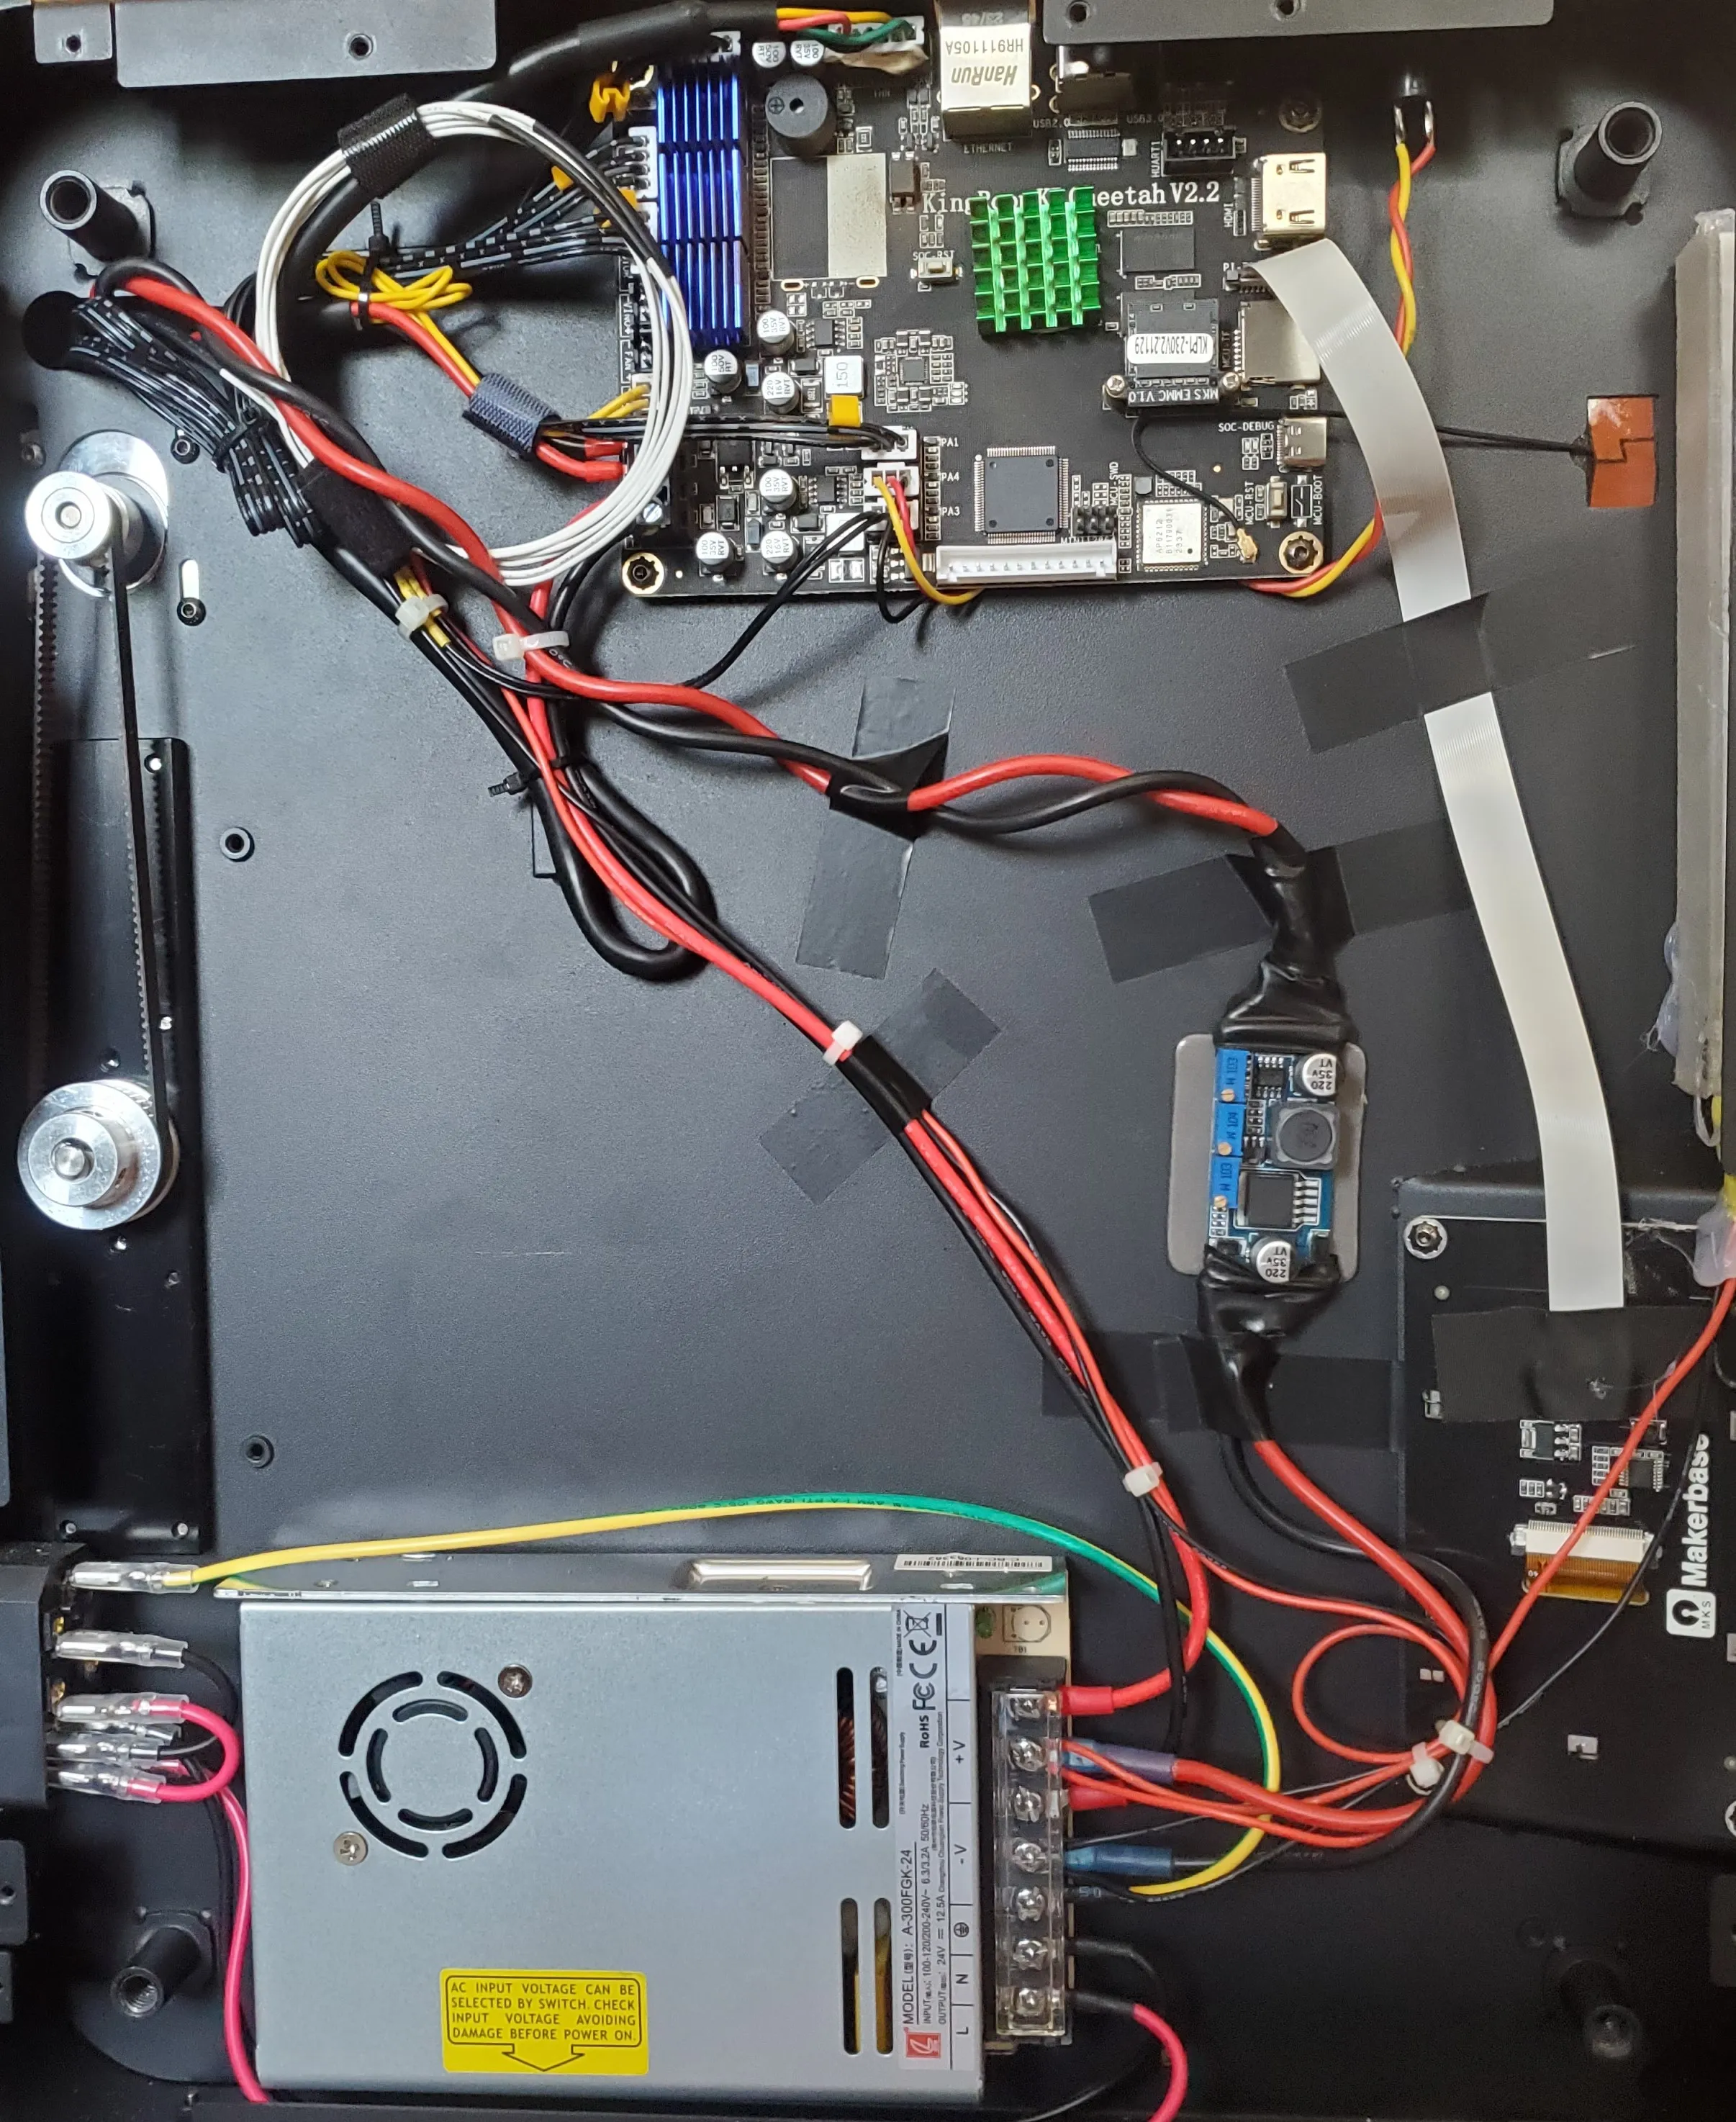
The sensor should show up in the UI automatically if you are using fluidd like me.
VOC Sensor
In addition to the filter I want to monitor the actual levels. I found this cool emissions sensor project that looks promising. I haven’t built it yet, but it’s next on the list!
Nice to Have Upgrades
These modifications are focused on ease-of-use and convenience.
Unload Button
I recently added the orbiter filament runout sensor to my LK5 Pro and I wanted the same functionality on my KLP1.
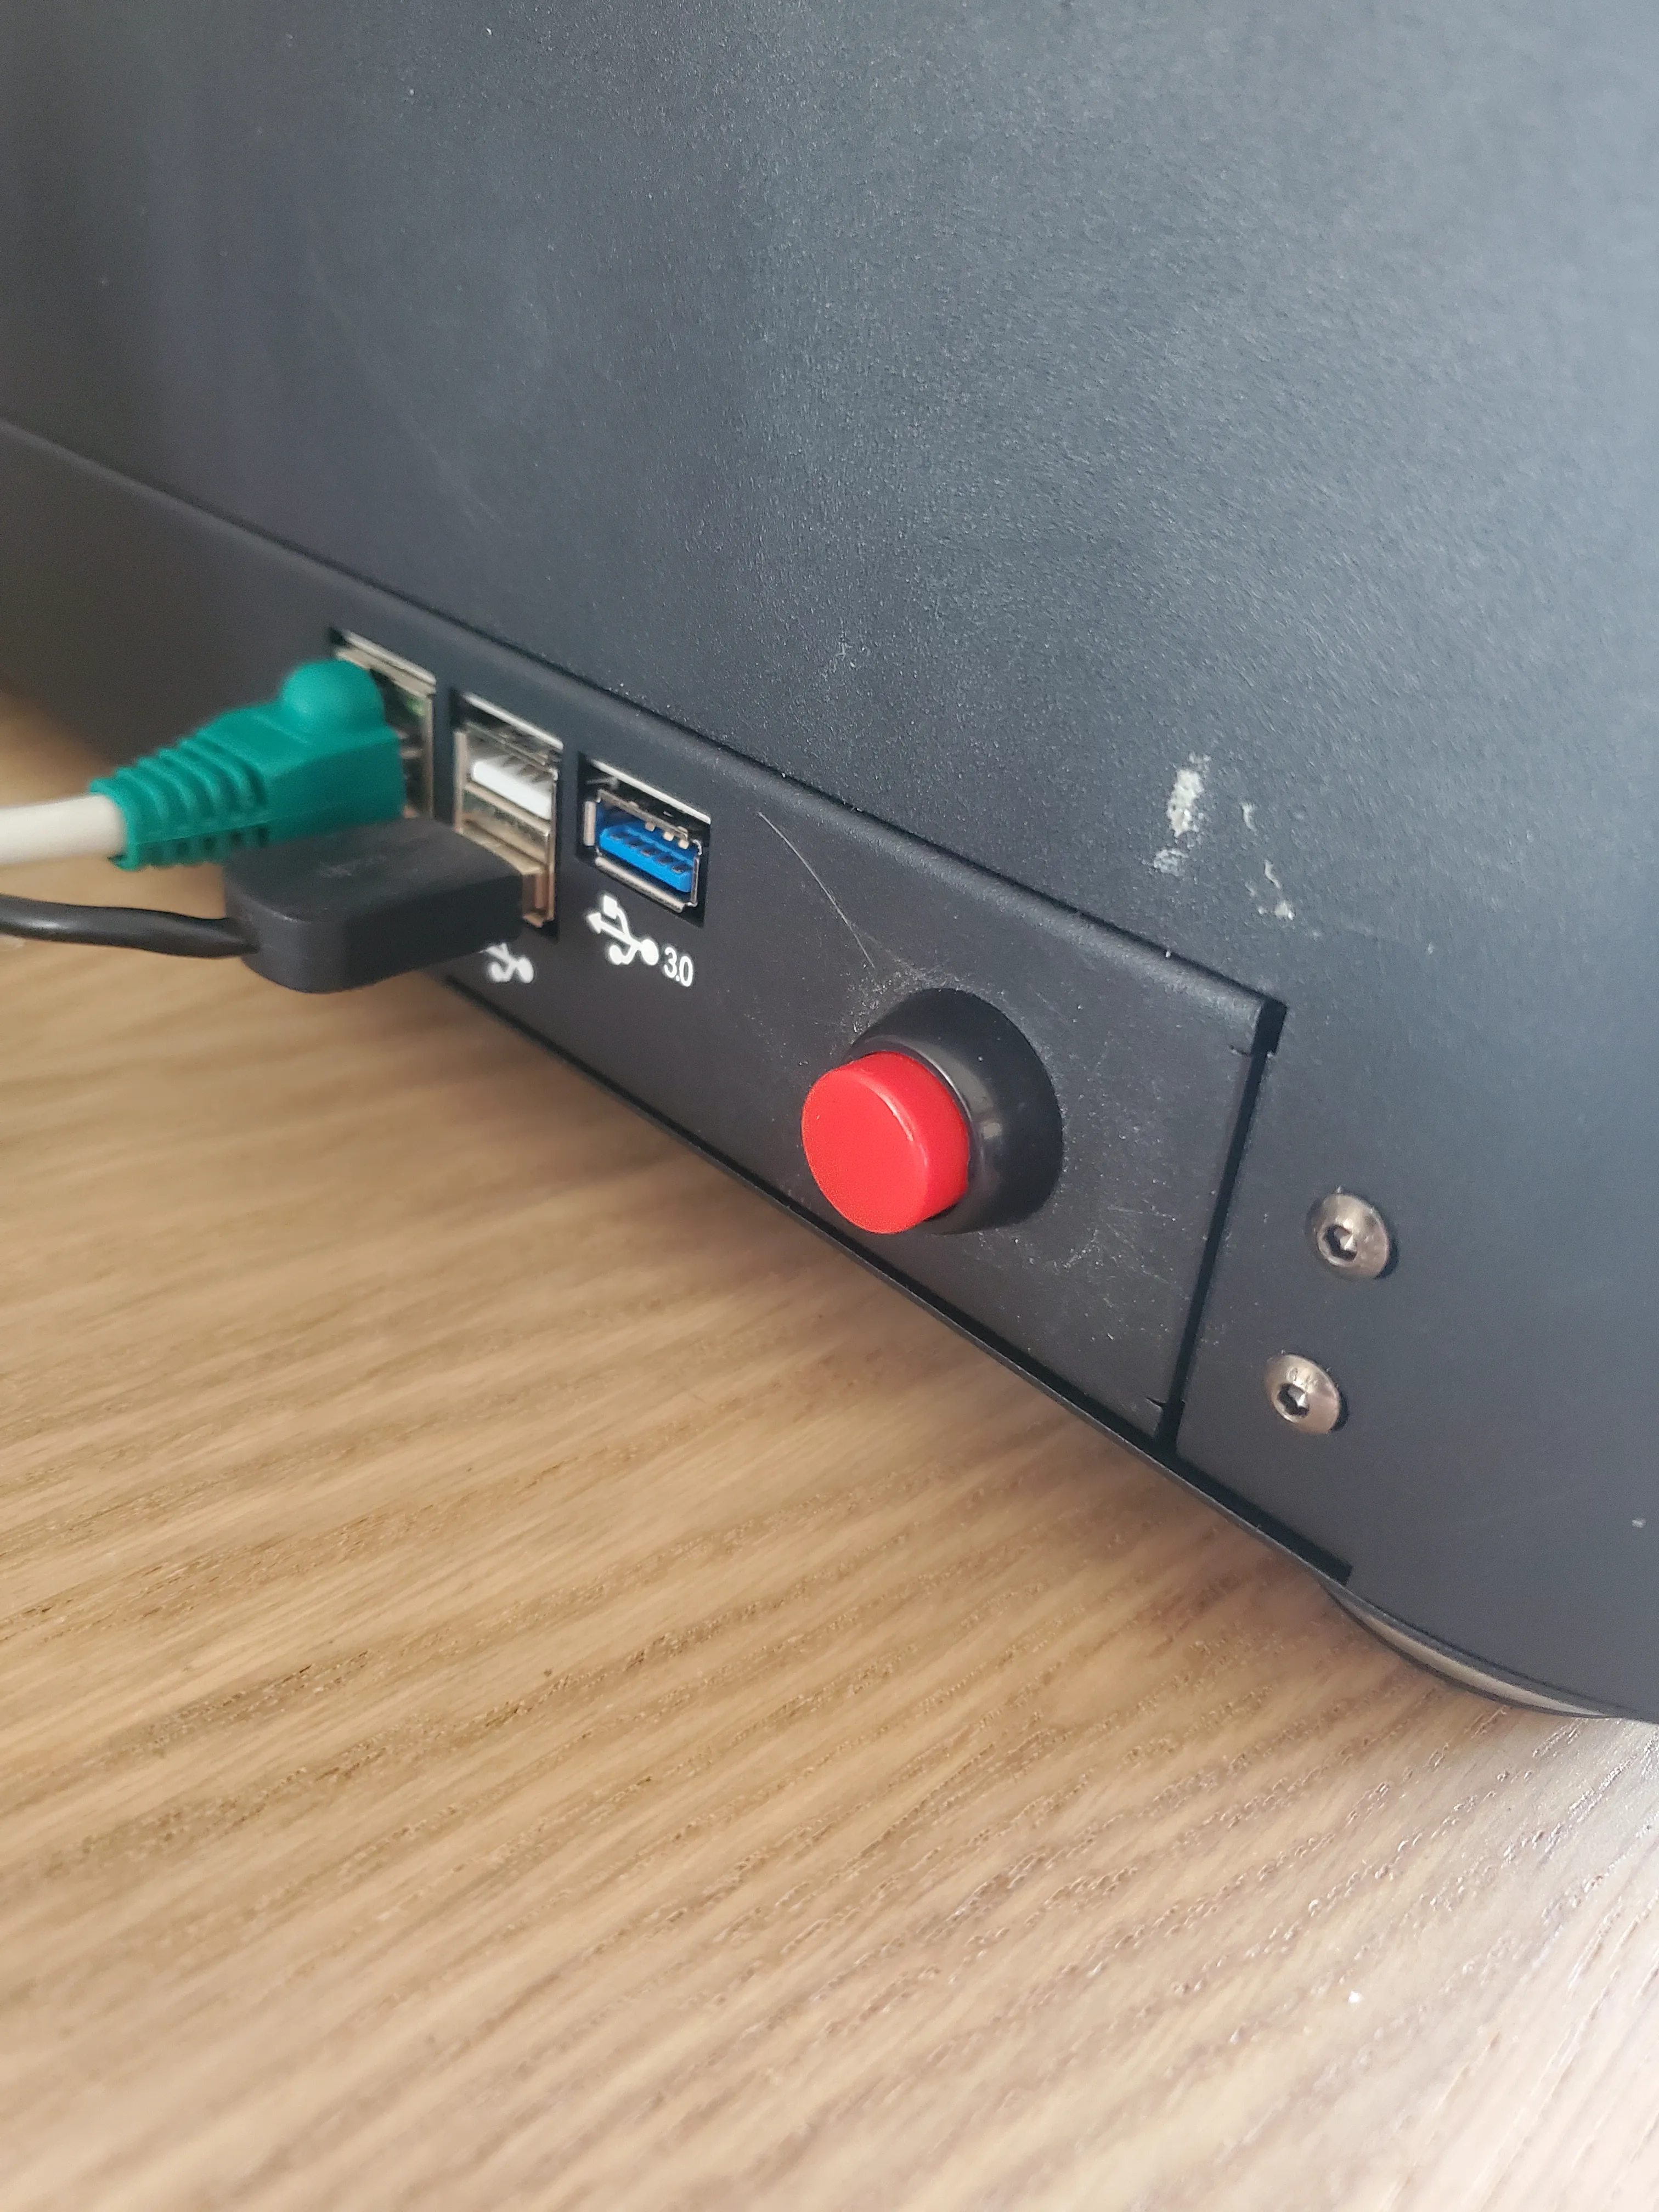
I simply drilled a hole and used a momentary button connected to the board. There should be a few open pins, depending on what you have already added. I mounted the button and wired it to the main board as shown below.
Wiring Diagram
We don’t need to use all three pins, just 5v and signal. Being a momentary switch, the polarity won’t matter.

Automation
I straight-up took this from the orbiter script on my LK5 pro and changed the pin and a few other things to match the different extruder.
[gcode_button filament_unload]
pin: PA4 # Green wire remove the negation "!" for sensor v1 - use just PA9 as example
release_gcode:  # filament unload procedure
  UNLOAD_FILAMENT
press_gcode: # do not add any macro call here
You may need to adjust some things or already have a macro, like me. There are variables that need to be set if you use the orbiter macros. You can read more about that on their site.
Lid Stops
The top lid is a nice feature for access and visibility, but it can get in the way and hits the spool sometimes. These door stops work great with the stock screws and print quickly. HINT: I installed mine backwards to work better with the slanted riser.
Pen Holder
This pen holder is a little silly because I don’t usually use the built-in screen but it is nice to have when you need it. The screen does not react well to a standard stylus, if at all, so it is a good idea to have it close by.
Camera
I used an old Microsoft webcam that I had lying around. It worked well because it is small, has a single mounting point and an EMI filter.
Install
I removed the existing mounting piece and replaced the pin with a small bolt. I mounted it using an existing hole in the front corner. I routed the wire down the side channel to the back and then out the hole in the riser. I used strips of tape to hold the wires down for now. I’m working on a design to both provide a bit of shielding of the LEDs and some wire clips. Then plug it in to the USB port on the side.
 |  |
Configuration
When you have connected it we need to configure klipper to use it. Click on Settings -> Cameras, then click the pencil icon to edit and save when you are done. I would double-check the settings as they tend to get set lower than what the camera is capable of. I have mine configured using crowsnest but the built-in is fine for most people. Choose what works best for you.
Lighting
I wanted internal lighting as well as to change the color of the front panel/branding area. The orange does not match our color scheme.
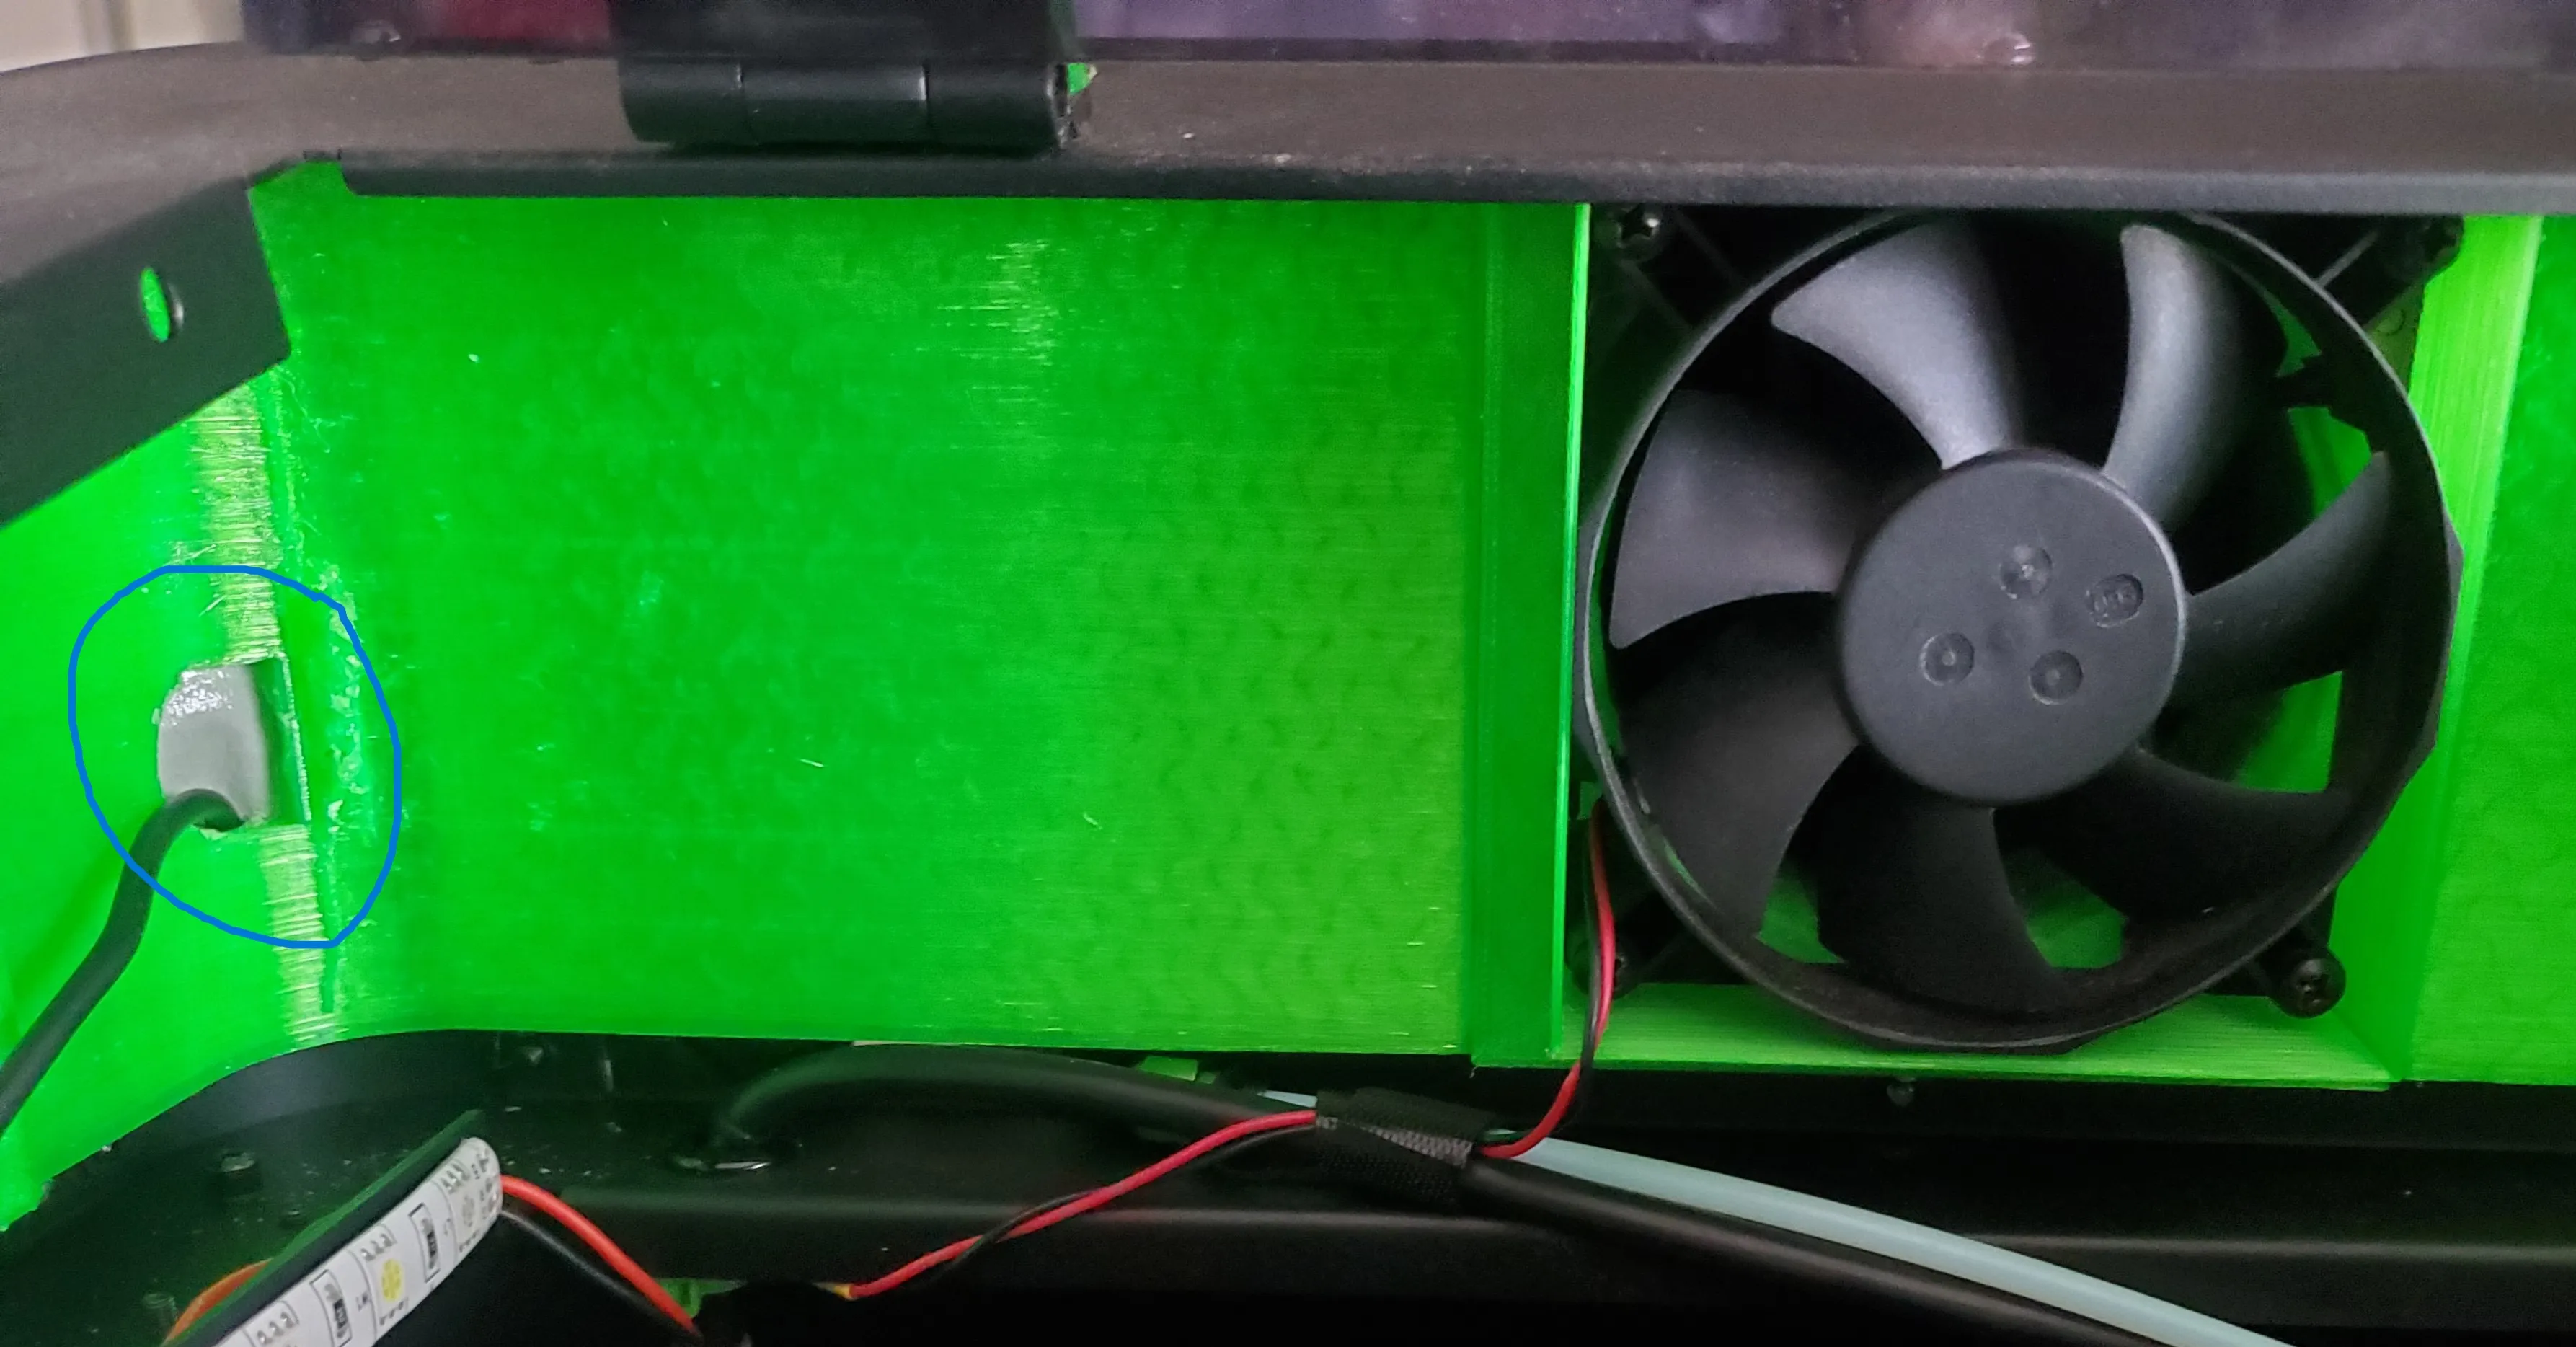
Interior
After adding the webcam I realized I was going to have to add lighting to get a decent picture. I went through a few ideas and ended up using some RGBW LED strips I had laying around from adding lighting to the LK5’s Lack enclosure. For that I used a microcontroller and some mosfets to control the strips. Here I just want to use the white LEDs. We can wire them to be on by connecting the ground/negative wire to the color we want and the positive wire to the +/positive input. Because the PSU is outputting 24v and the strips are 12v we cant connect them normally (in series). We can solve this easily by adding a buck converter, or more simply use 2 strips wired in parallel.
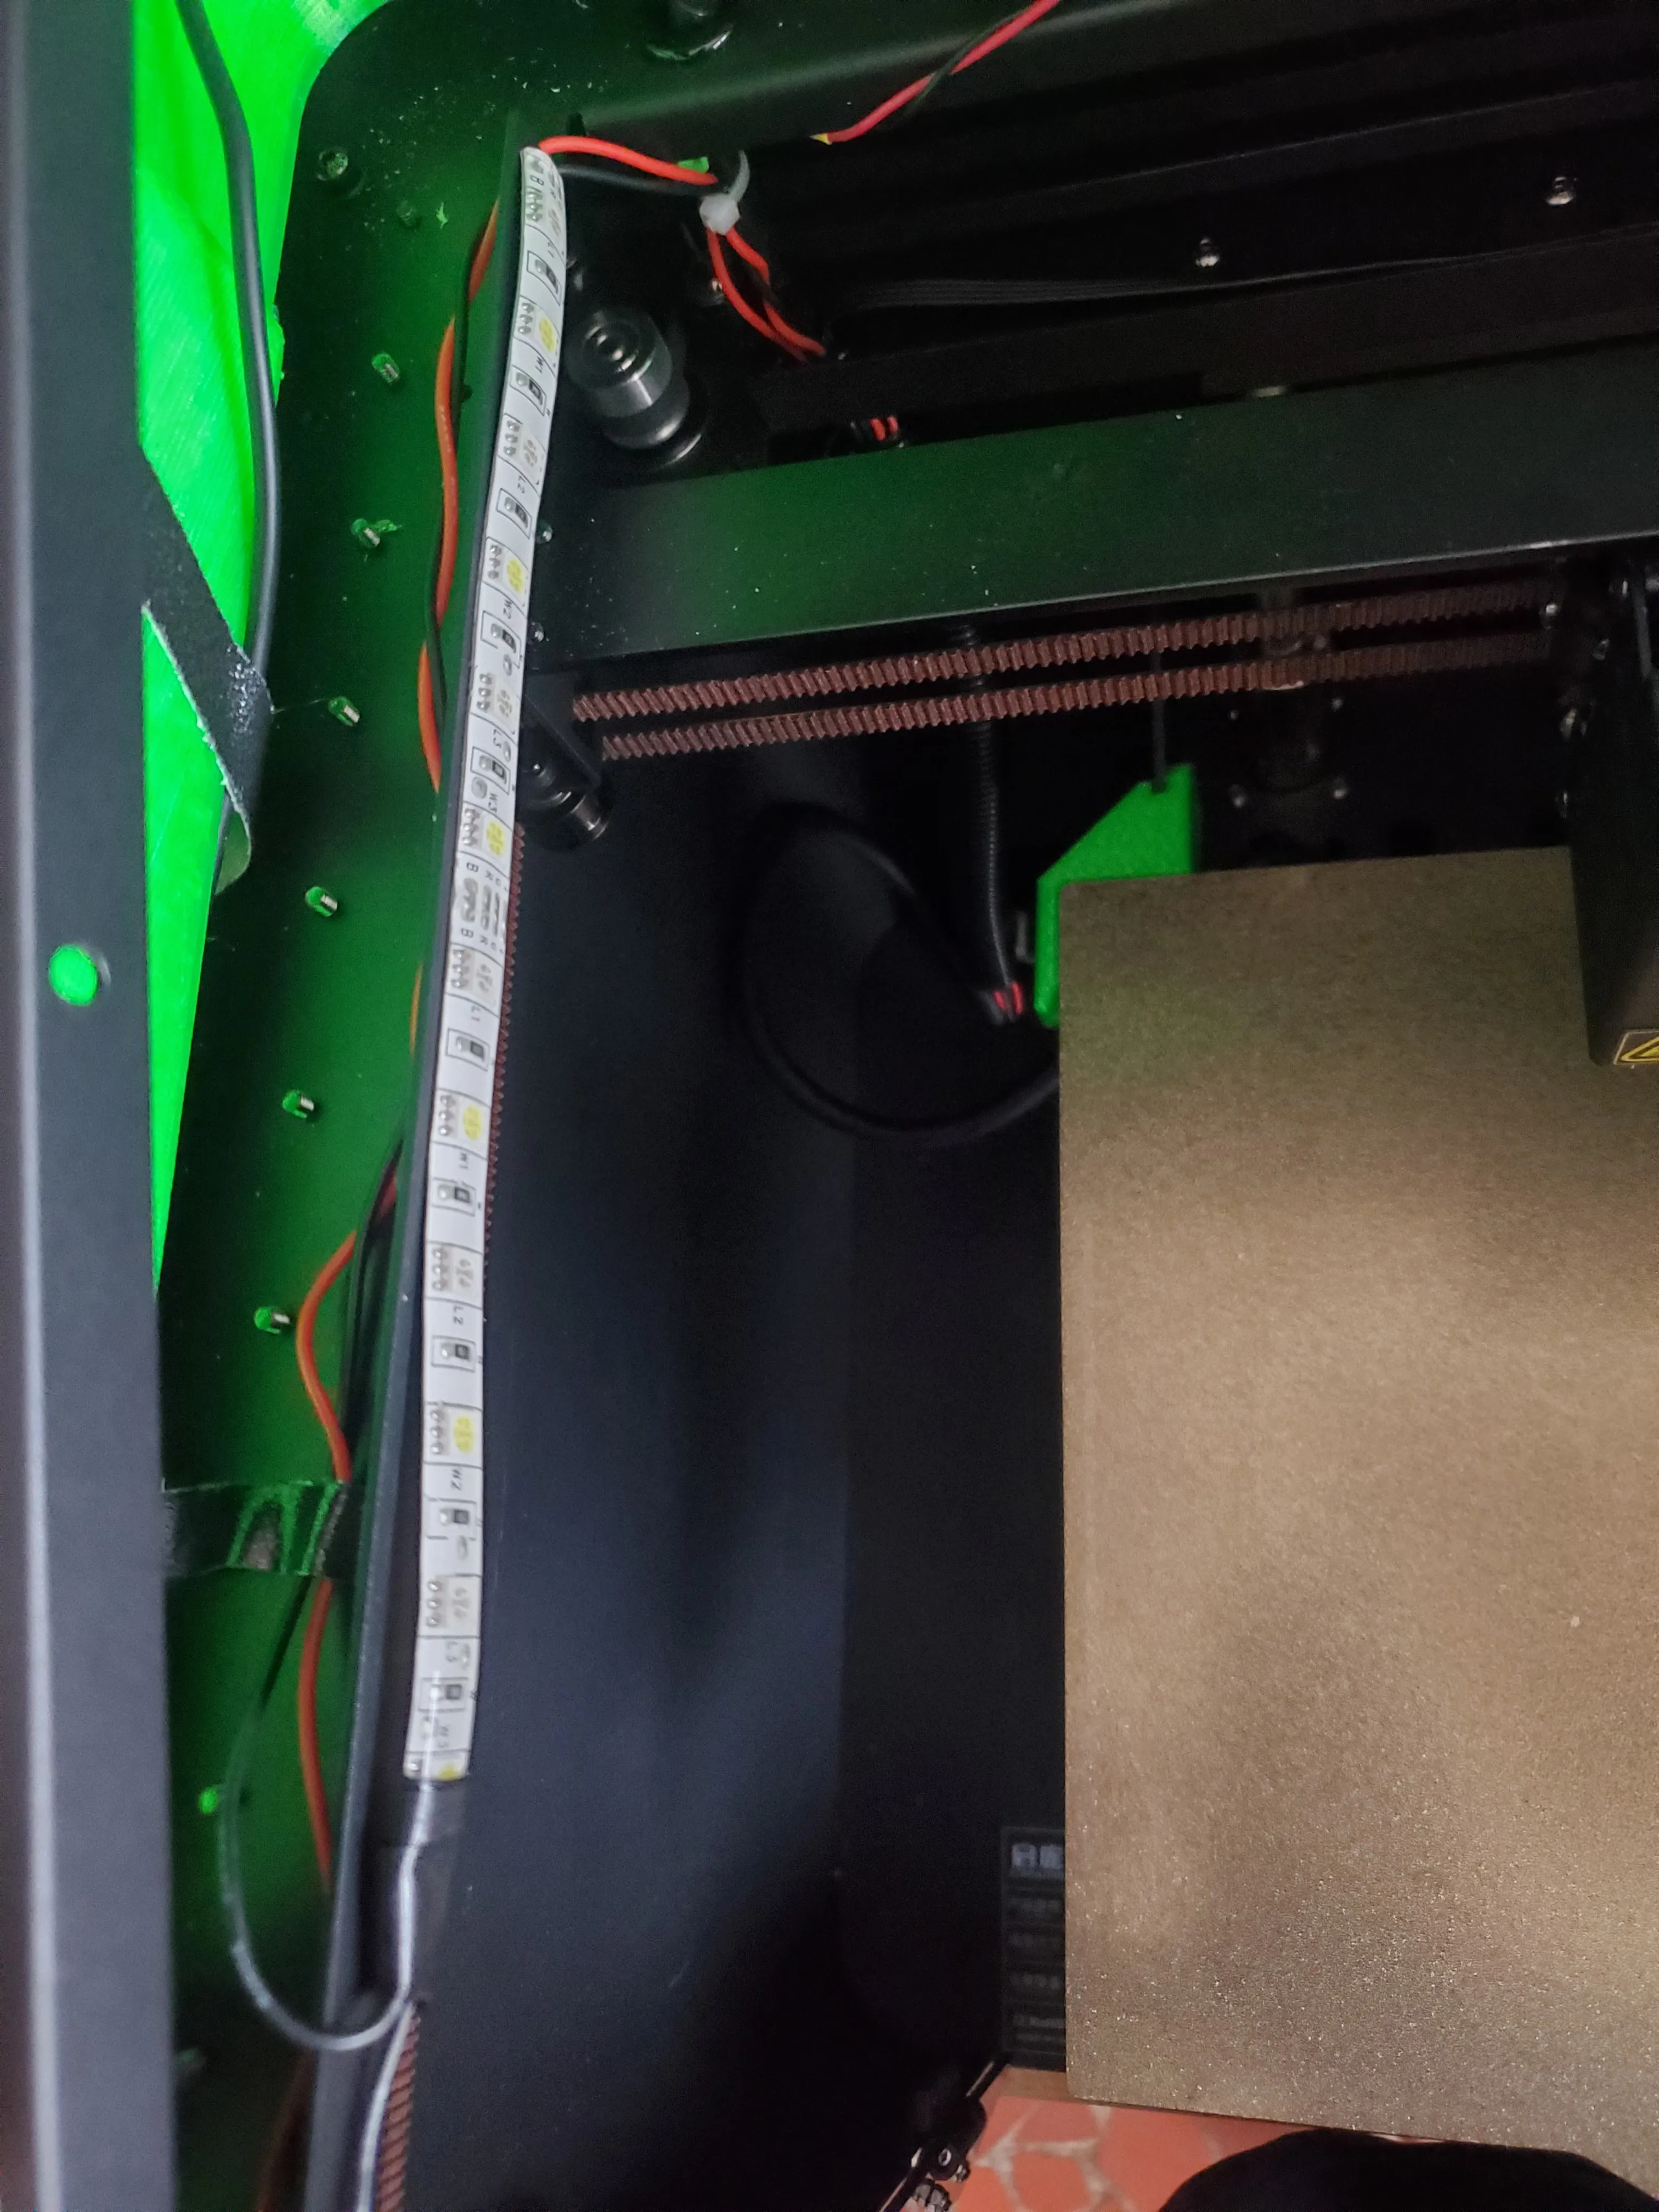 | |
I’m not going to explain it all here, but when you wire things in parallel the input voltage is split evenly. I ran the wires down the side channel, like the camera, and down the wiring loom into the PSU. You could add a switch if you want but I was fine with them being on always. For now at least.
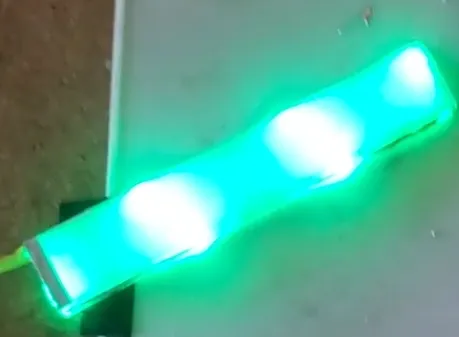
Front Panel
I used the same parallel wiring to use some RGB LEDs on the front panel. The original model had a green light, which would have been perfect for me because of the green riser I added, but now has an orange LED. You can see the orange in the title image at the top and some of the other pics here.
As a good 3d printer owner, I knew I couldn’t just accept this so I made this.
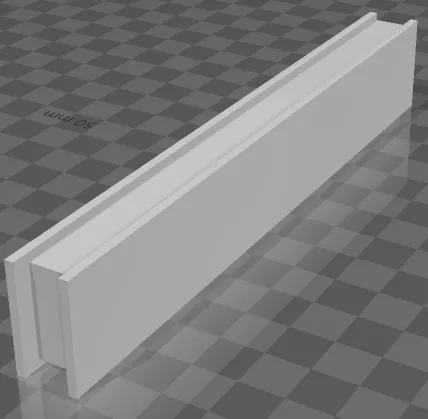
Its nothing special, just a rectangle with a channel for the LED strips. I wrapped the strip around a bit so that there was an LED on all sides. I printed the one in the pics in clear TPU, mostly because that is what I had laying around. I think clear PETG would be better but I had like half a meter of it laying around. I would think that the pattern used for the infill would affect the way the light is diffracted. Probably the nozzle temperature too.
Removing the existing light takes some finesse to keep from breaking it but it isn’t too bad. First, I removed the wires from the power supply. Then I used a combo of a hobby knife and some prying tools to cut the adhesive and pry it gently away from the chassis.
I dropped some CA glue into the channel every few centimeters to hold the LED strips in place. Then I used a few globs of hot glue to secure it in place in the printer chassis. Here it is all lit up and color matched.

Klipper
There are some custom things that Kingroon added to klipper but I don’t find them necessary and would rather be up to date with the main klipper branch. I also use OctoApp on Android so I have their plugin installed.
The klipper configs are on my github. I have some custom stuff in there but the big thing is the re-organization. I tried to make it more modular, easier to understand, to add missing macros etc. Feel free to use this as a base but understand that this is custom to all my modifications and you may need to make changes to pins or other values.
I would love to hear about what upgrades you have done and why. What are some weird/cool/convenience things you have done to make your printer work better or easier to use. Leave a comment.